

1
Choose your connection type
- Claude.ai / Claude Desktop connector: find ABConvert in Claude’s connector directory and authorize it with a one-time connect code. No Client ID or Client Secret is required.
- Claude Code or another header-based client: mint an API token and send it as an Authorization header.
2
Connect your AI assistant
- Claude Desktop / Claude.ai
- ChatGPT
- Claude Code (CLI)
- OpenClaw / other MCP clients
- Open Claude’s connector directory on desktop or web, search for ABConvert, and choose Connect.
-
In ABConvert, choose the surface your store shows:
- If the Integrations Hub is enabled, open Integrations → MCP, select Claude, then choose Desktop / web.
- Otherwise, open Settings → MCP & API Access and use the Generate a Connect Code card.
- Click Generate connect code. On the Integrations Hub, it is under 2. Authorize This Store. In Settings, it is in the Generate a Connect Code card.
- When Claude opens the ABConvert authorization page, enter that code, check the store domain, and approve access.
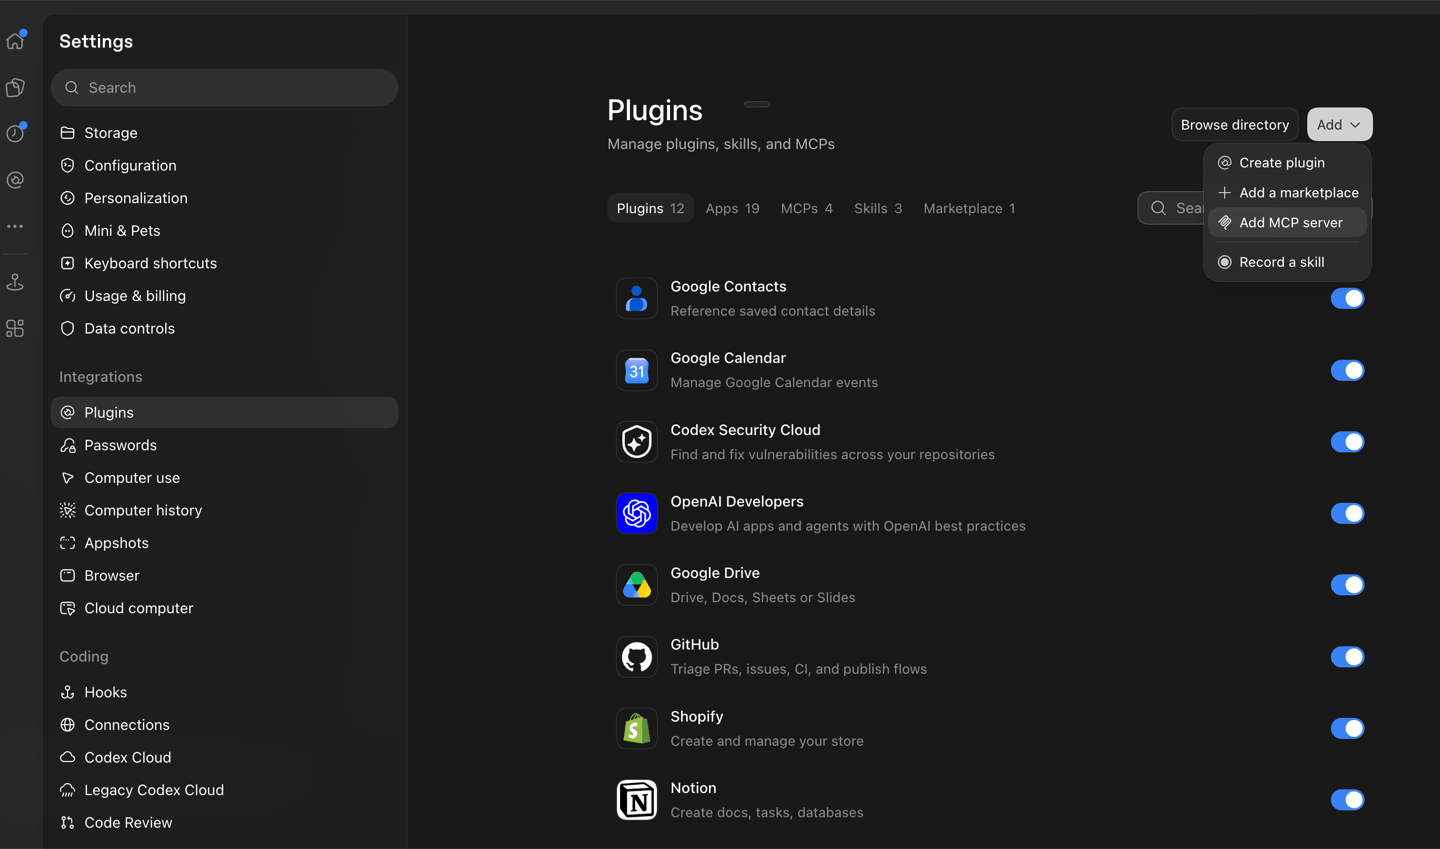
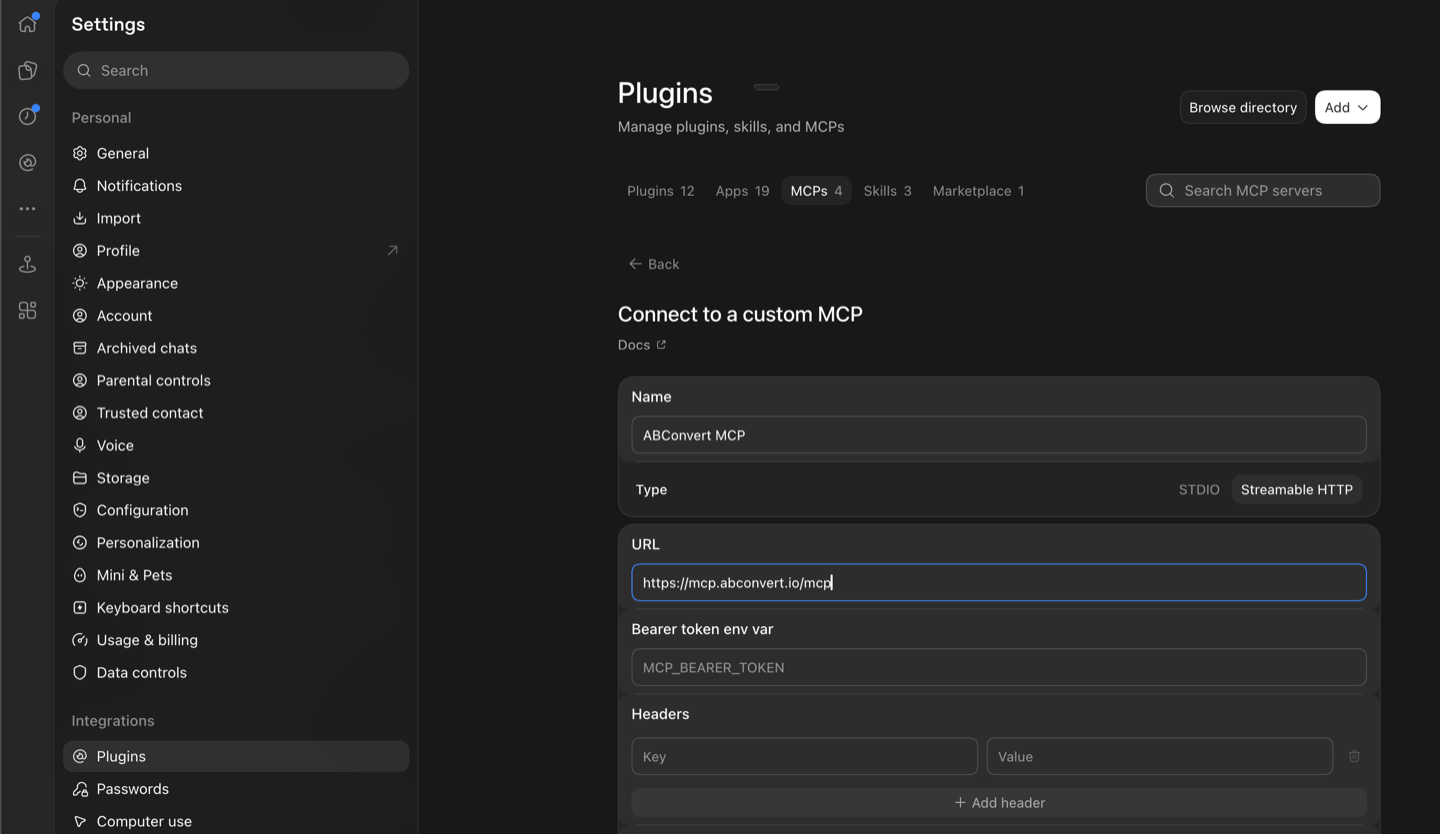
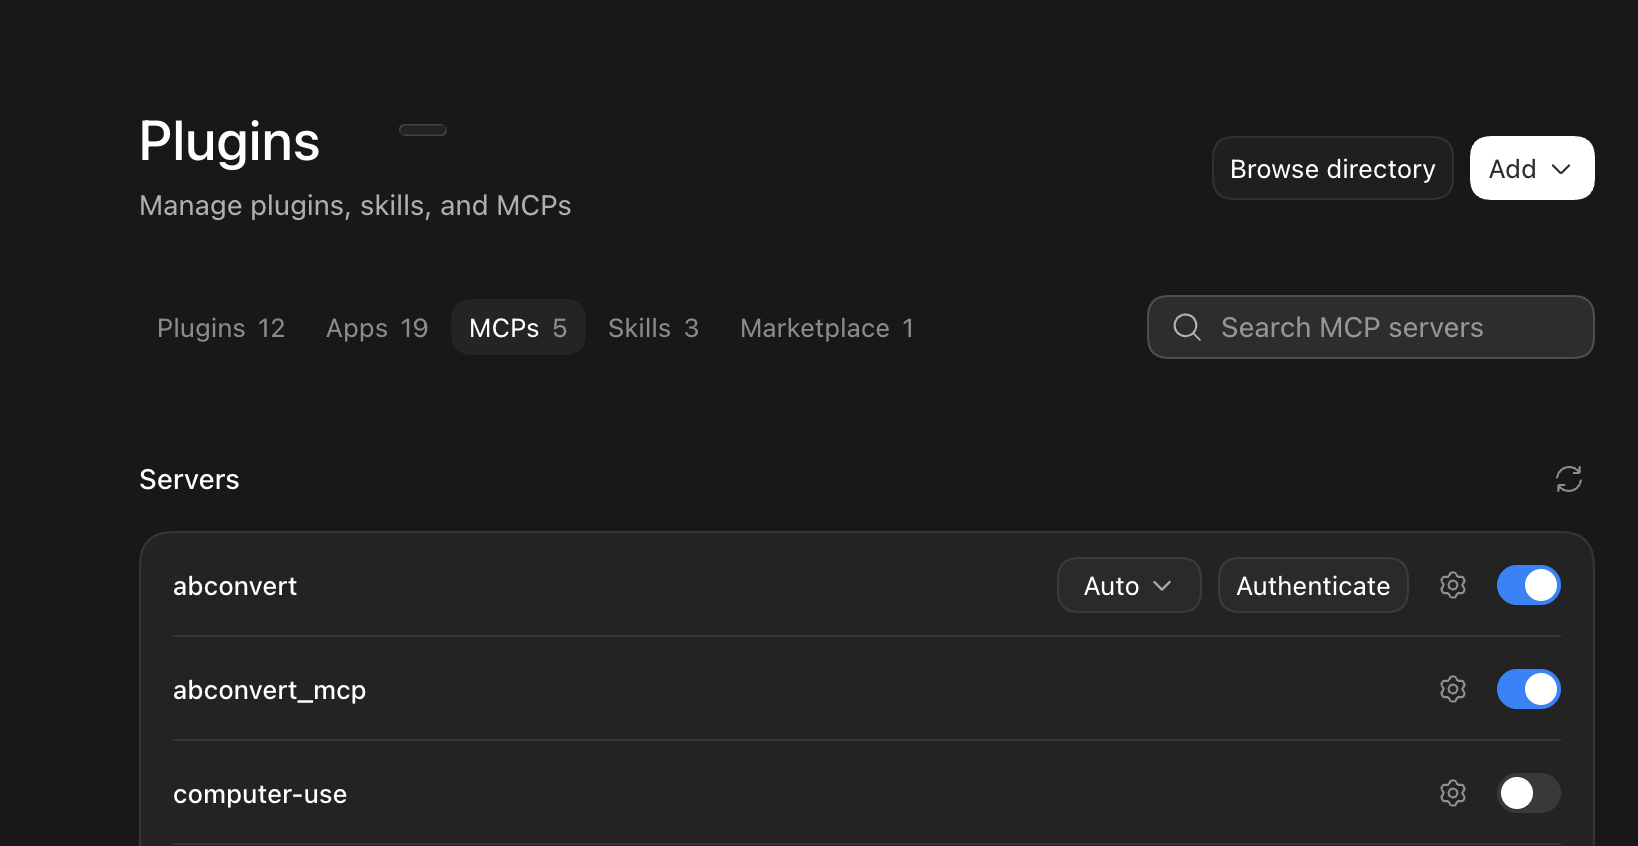
3
Confirm the connection
Open a new chat and type:
“Use the ABConvert ping tool”You should see the assistant call
ping and respond with { ok: true }. If a URL-only connector cannot authorize, generate a new connect code and restart that connector’s authorization flow. If a header-based client sees 401, mint or select the correct token. If you see “MCP is not enabled for this shop,” ask ABConvert support to enable the feature for your store.4
Run your first real prompt
Try one of these:The assistant asks for a hypothesis, primary metric, and traffic split before creating anything. Once you confirm, the test lands in your dashboard as a draft — you can review it, then launch from the dashboard or by saying “launch it” in the chat.
Price test
“Test 10% off my best-selling product”
Shipping test
“Test free shipping over $50 for US visitors”
Compare results
“How is my snowboard price test doing?”
URL redirect
“Send 50% of /products/old-hoodie traffic to /products/new-hoodie”
You’re done
That’s the full setup. Everything else is just exploration — see What you can do for the full surface.In-app connection guide
When the Integrations Hub is enabled, select Claude, ChatGPT, Codex, or Other MCP Clients. Within Claude, choose Desktop / web or Claude Code. Follow the numbered steps, expand Set up manually when needed, and copy the example prompt to verify your connection. Legacy Settings shows direct Generate a Connect Code and Access tokens cards instead.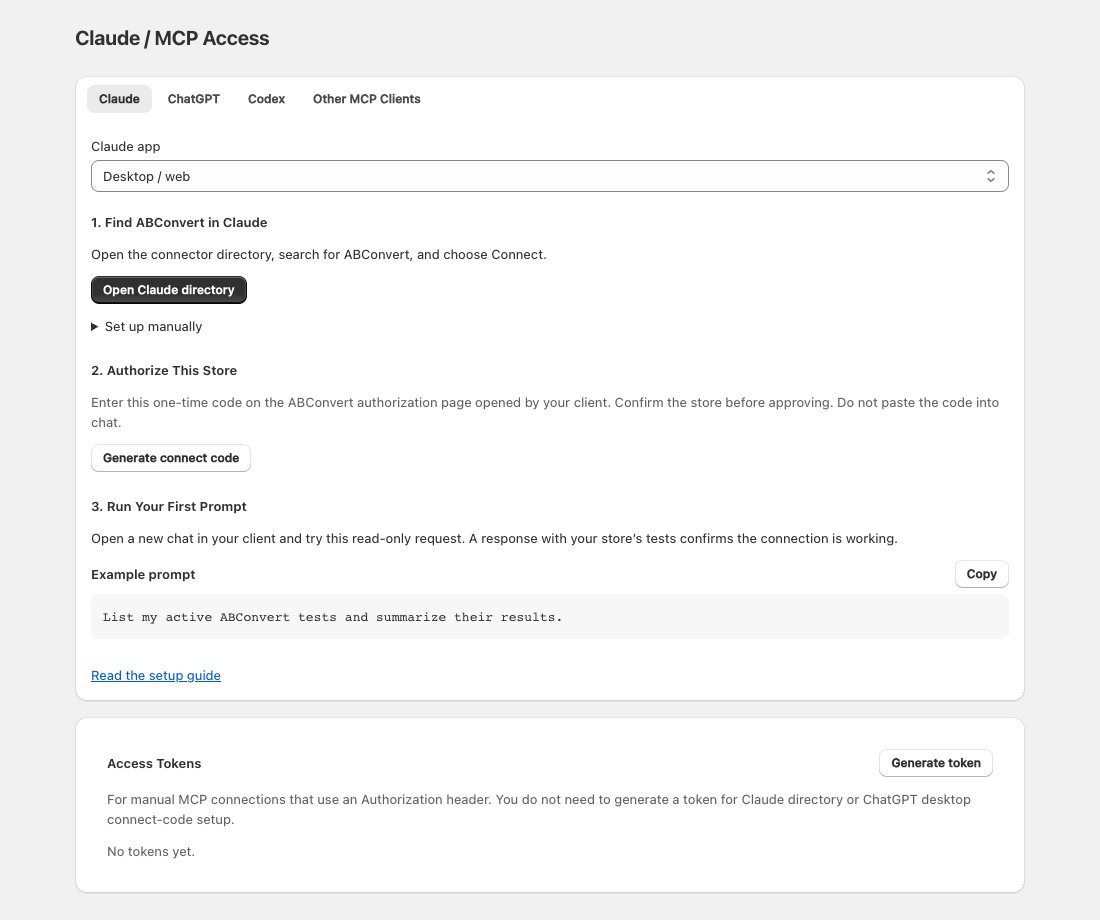
Claude desktop and web setup in ABConvert’s MCP guide. Local preview with no store data or credentials.
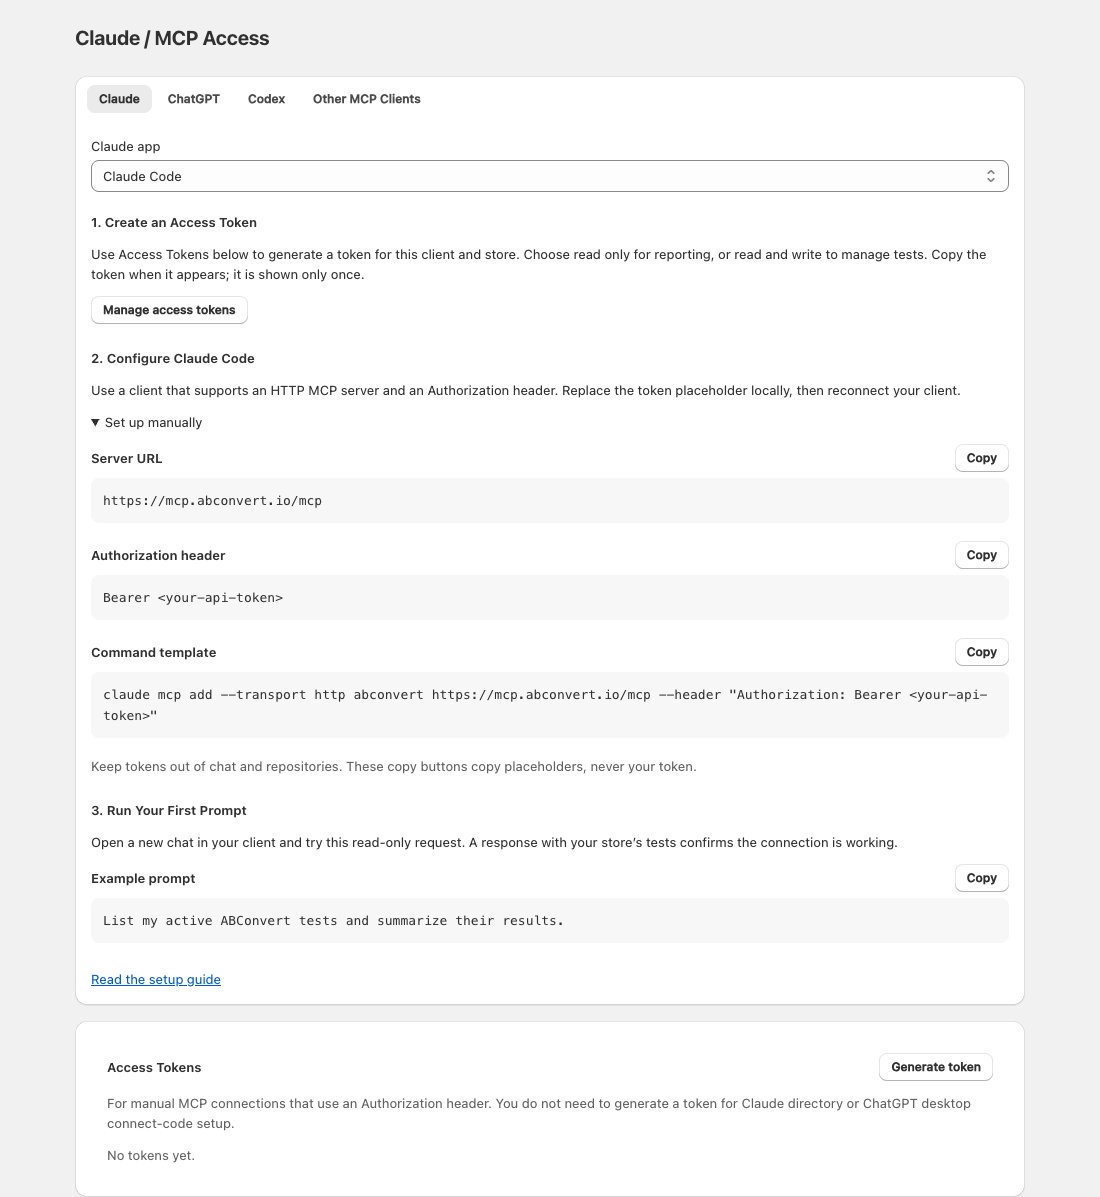
Manual connection instructions for Claude Code. Local preview with placeholder credentials only.
Token management
- One token per header-based app. Mint a separate token for Claude Code, OpenClaw, and every other header-based client. You can revoke one without breaking the others.
- OAuth connectors use connect codes. Claude directory and custom connectors do not use merchant-generated Client IDs or Client Secrets. Generate a new connect code for each authorization attempt.
- Revoke tokens at any time. In the Integrations Hub, open Integrations → MCP, select Claude → Claude Code, then choose Manage access tokens. In legacy Settings, use Settings → MCP & API Access and the Access tokens card. Revoke the token to stop its next request.
- Tokens are shop-scoped. A token minted for Shop A cannot access Shop B, even if the same person owns both.