> ## Documentation Index
> Fetch the complete documentation index at: https://docs.abconvert.io/llms.txt
> Use this file to discover all available pages before exploring further.
# App Settings: Configure ABConvert for Your Store
> Control how ABConvert runs on your store — from tracking scripts and order tagging to COGS configuration and Google Analytics.
The Settings page is where you control the core behavior of ABConvert across your store. Most settings apply globally to all experiments, so it's worth reviewing them before you launch your first test.
## Theme connection
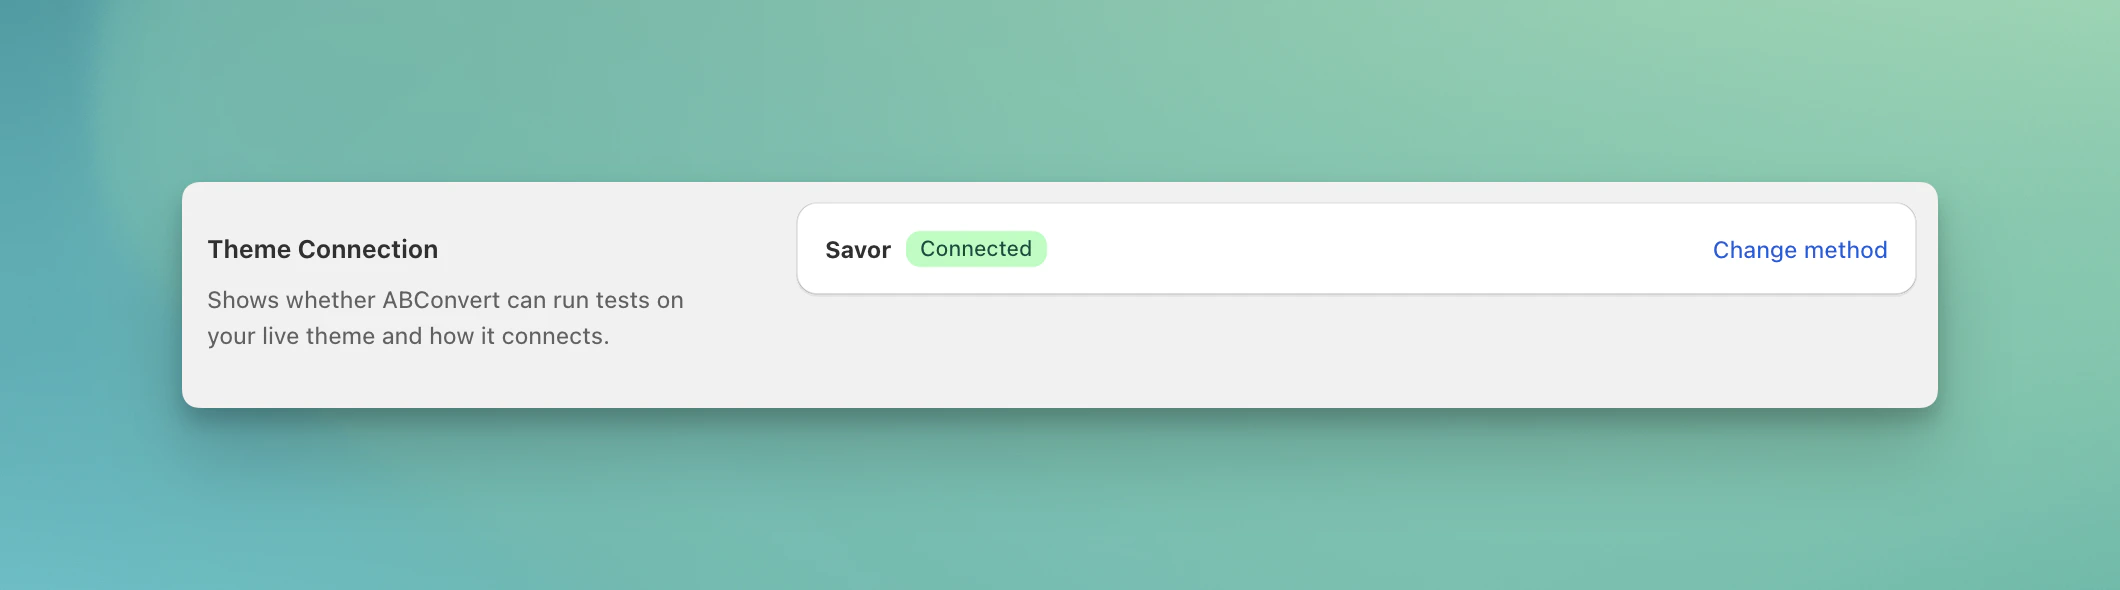
The ABConvert unified script must be activated in your theme for experiments to run. This app embed loads the tracking and experiment logic on every page of your storefront. You can check connection status or change methods here.
 ### Connect method 1: Theme embed app (recommended)
1. Click **Change method**
2. Choose **Use app embed**
### Connect method 1: Theme embed app (recommended)
1. Click **Change method**
2. Choose **Use app embed**
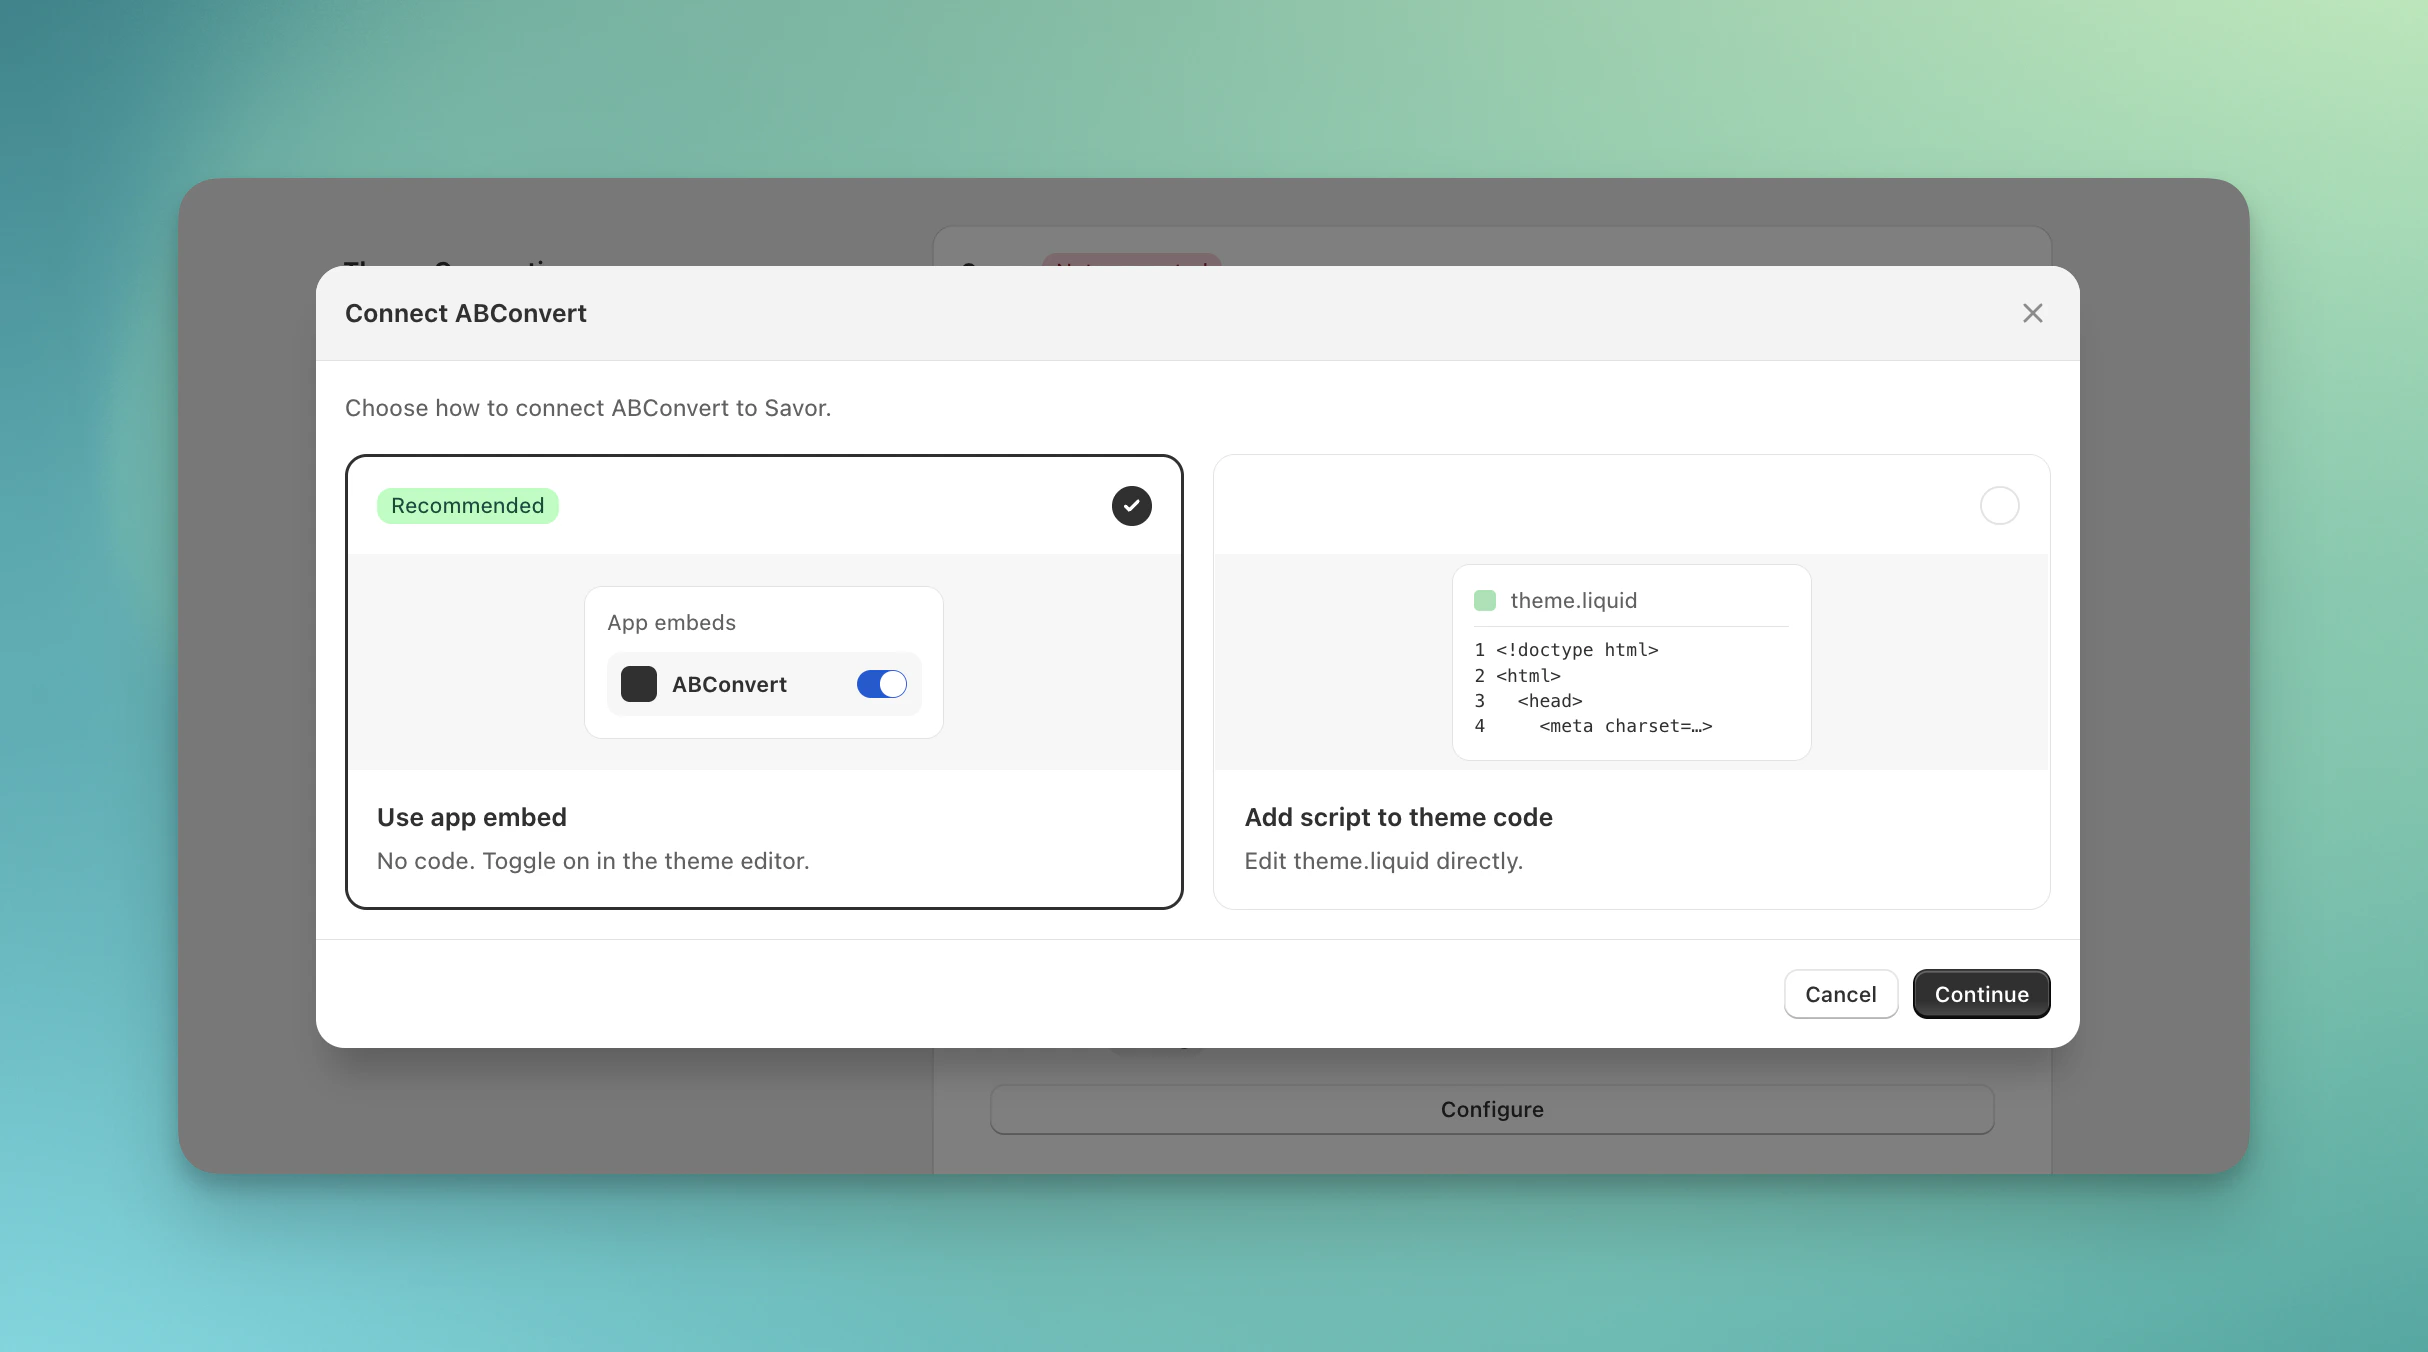 3. Follow the steps to enable in Shopify theme editor and click **Verify status** to check
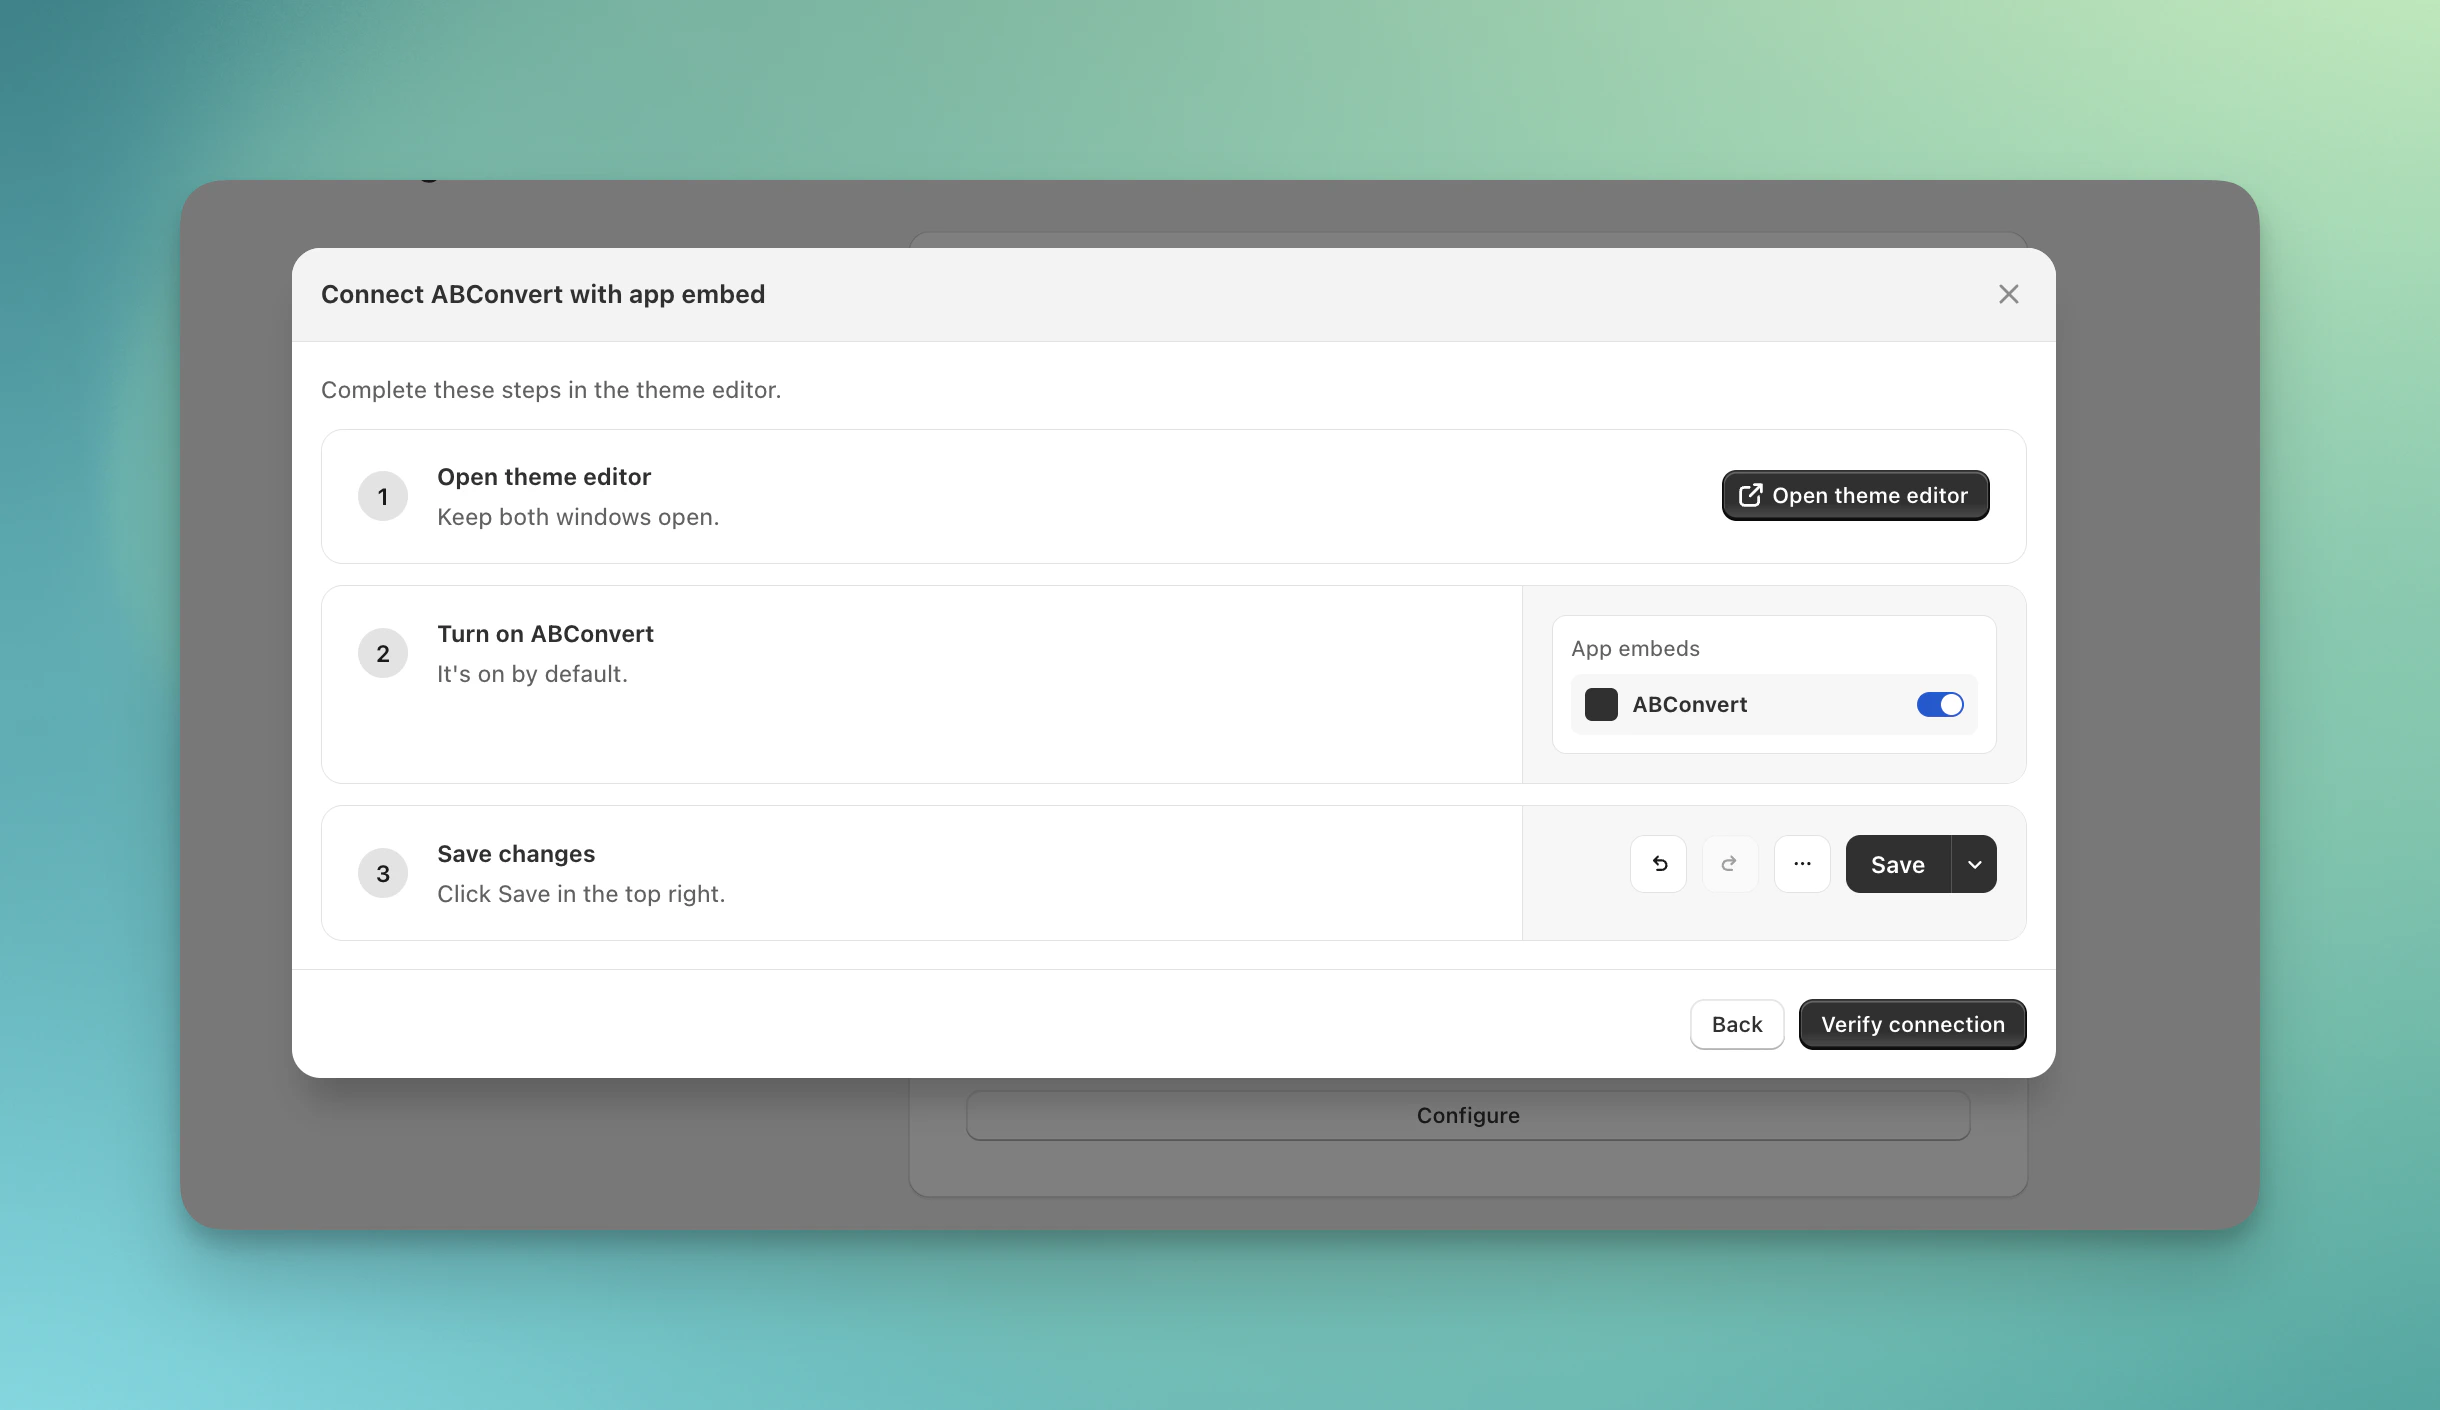 Once enabled, the unified script loads automatically on all pages. You don't need to re-enable it unless you switch to a new theme.
### Connect method 2: Manual installation (for edge cases)
If your theme has a unique pattern or needs special configuration for better performance, you can install the script manually by adding a code snippet to your theme's `theme.liquid` file. This method requires manual management to your theme files, only change to this method when needed.
Manual installation requires editing your theme code manually. If you're not comfortable with Liquid or HTML, contact ABConvert support for assistance.
**Steps for manual installation:**
1. Click **Change method**
2. Choose **Add script to theme code**
Once enabled, the unified script loads automatically on all pages. You don't need to re-enable it unless you switch to a new theme.
### Connect method 2: Manual installation (for edge cases)
If your theme has a unique pattern or needs special configuration for better performance, you can install the script manually by adding a code snippet to your theme's `theme.liquid` file. This method requires manual management to your theme files, only change to this method when needed.
Manual installation requires editing your theme code manually. If you're not comfortable with Liquid or HTML, contact ABConvert support for assistance.
**Steps for manual installation:**
1. Click **Change method**
2. Choose **Add script to theme code**
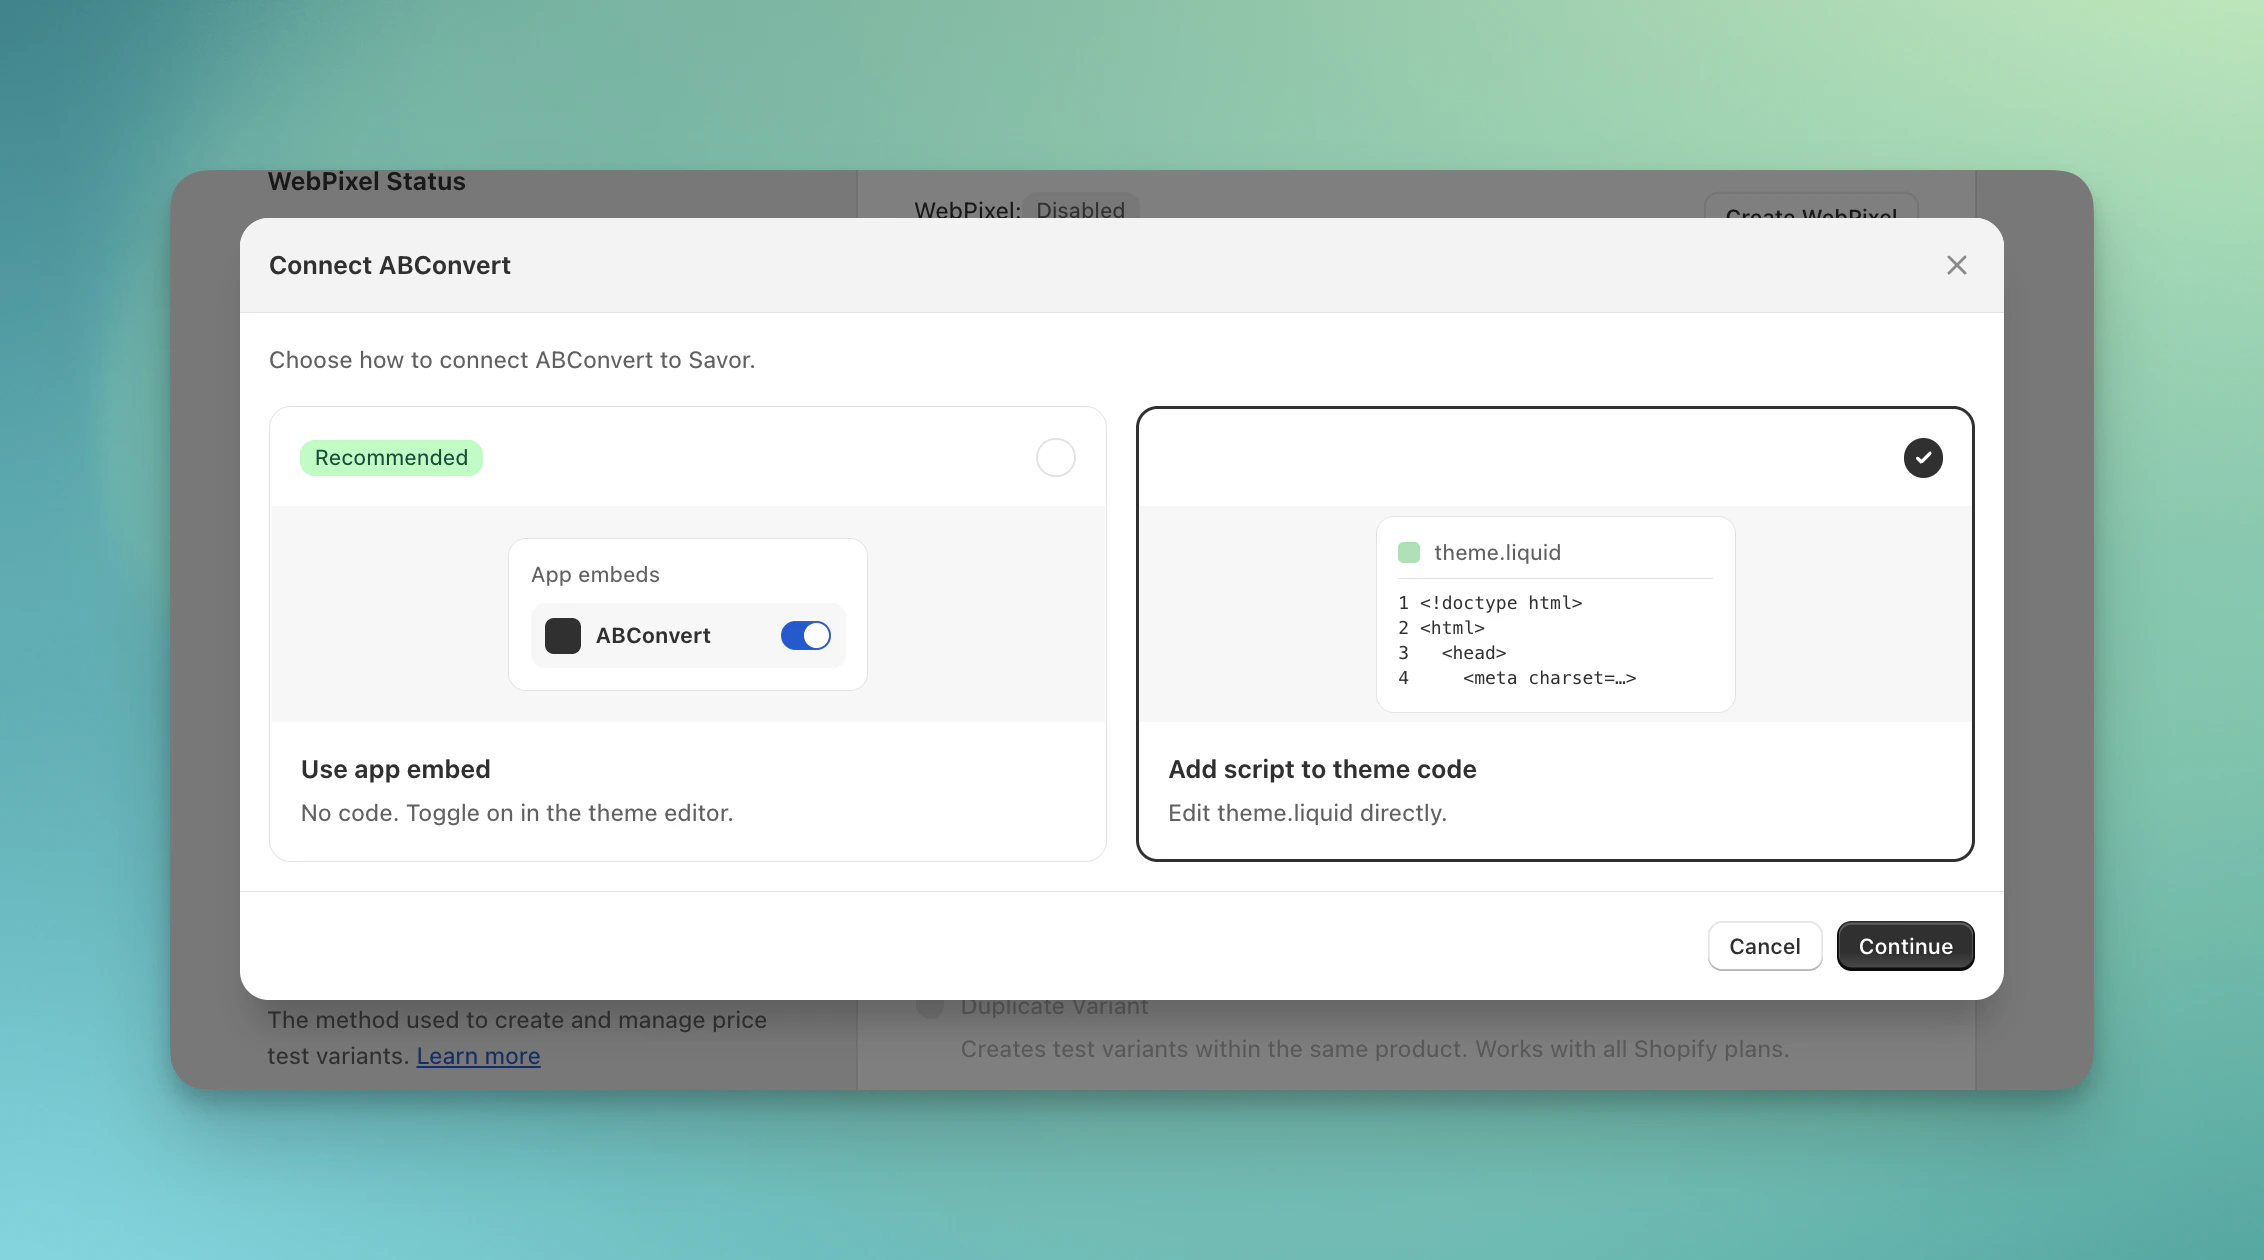 3. Follow the steps to add scripts to your Shopify theme.liquid file
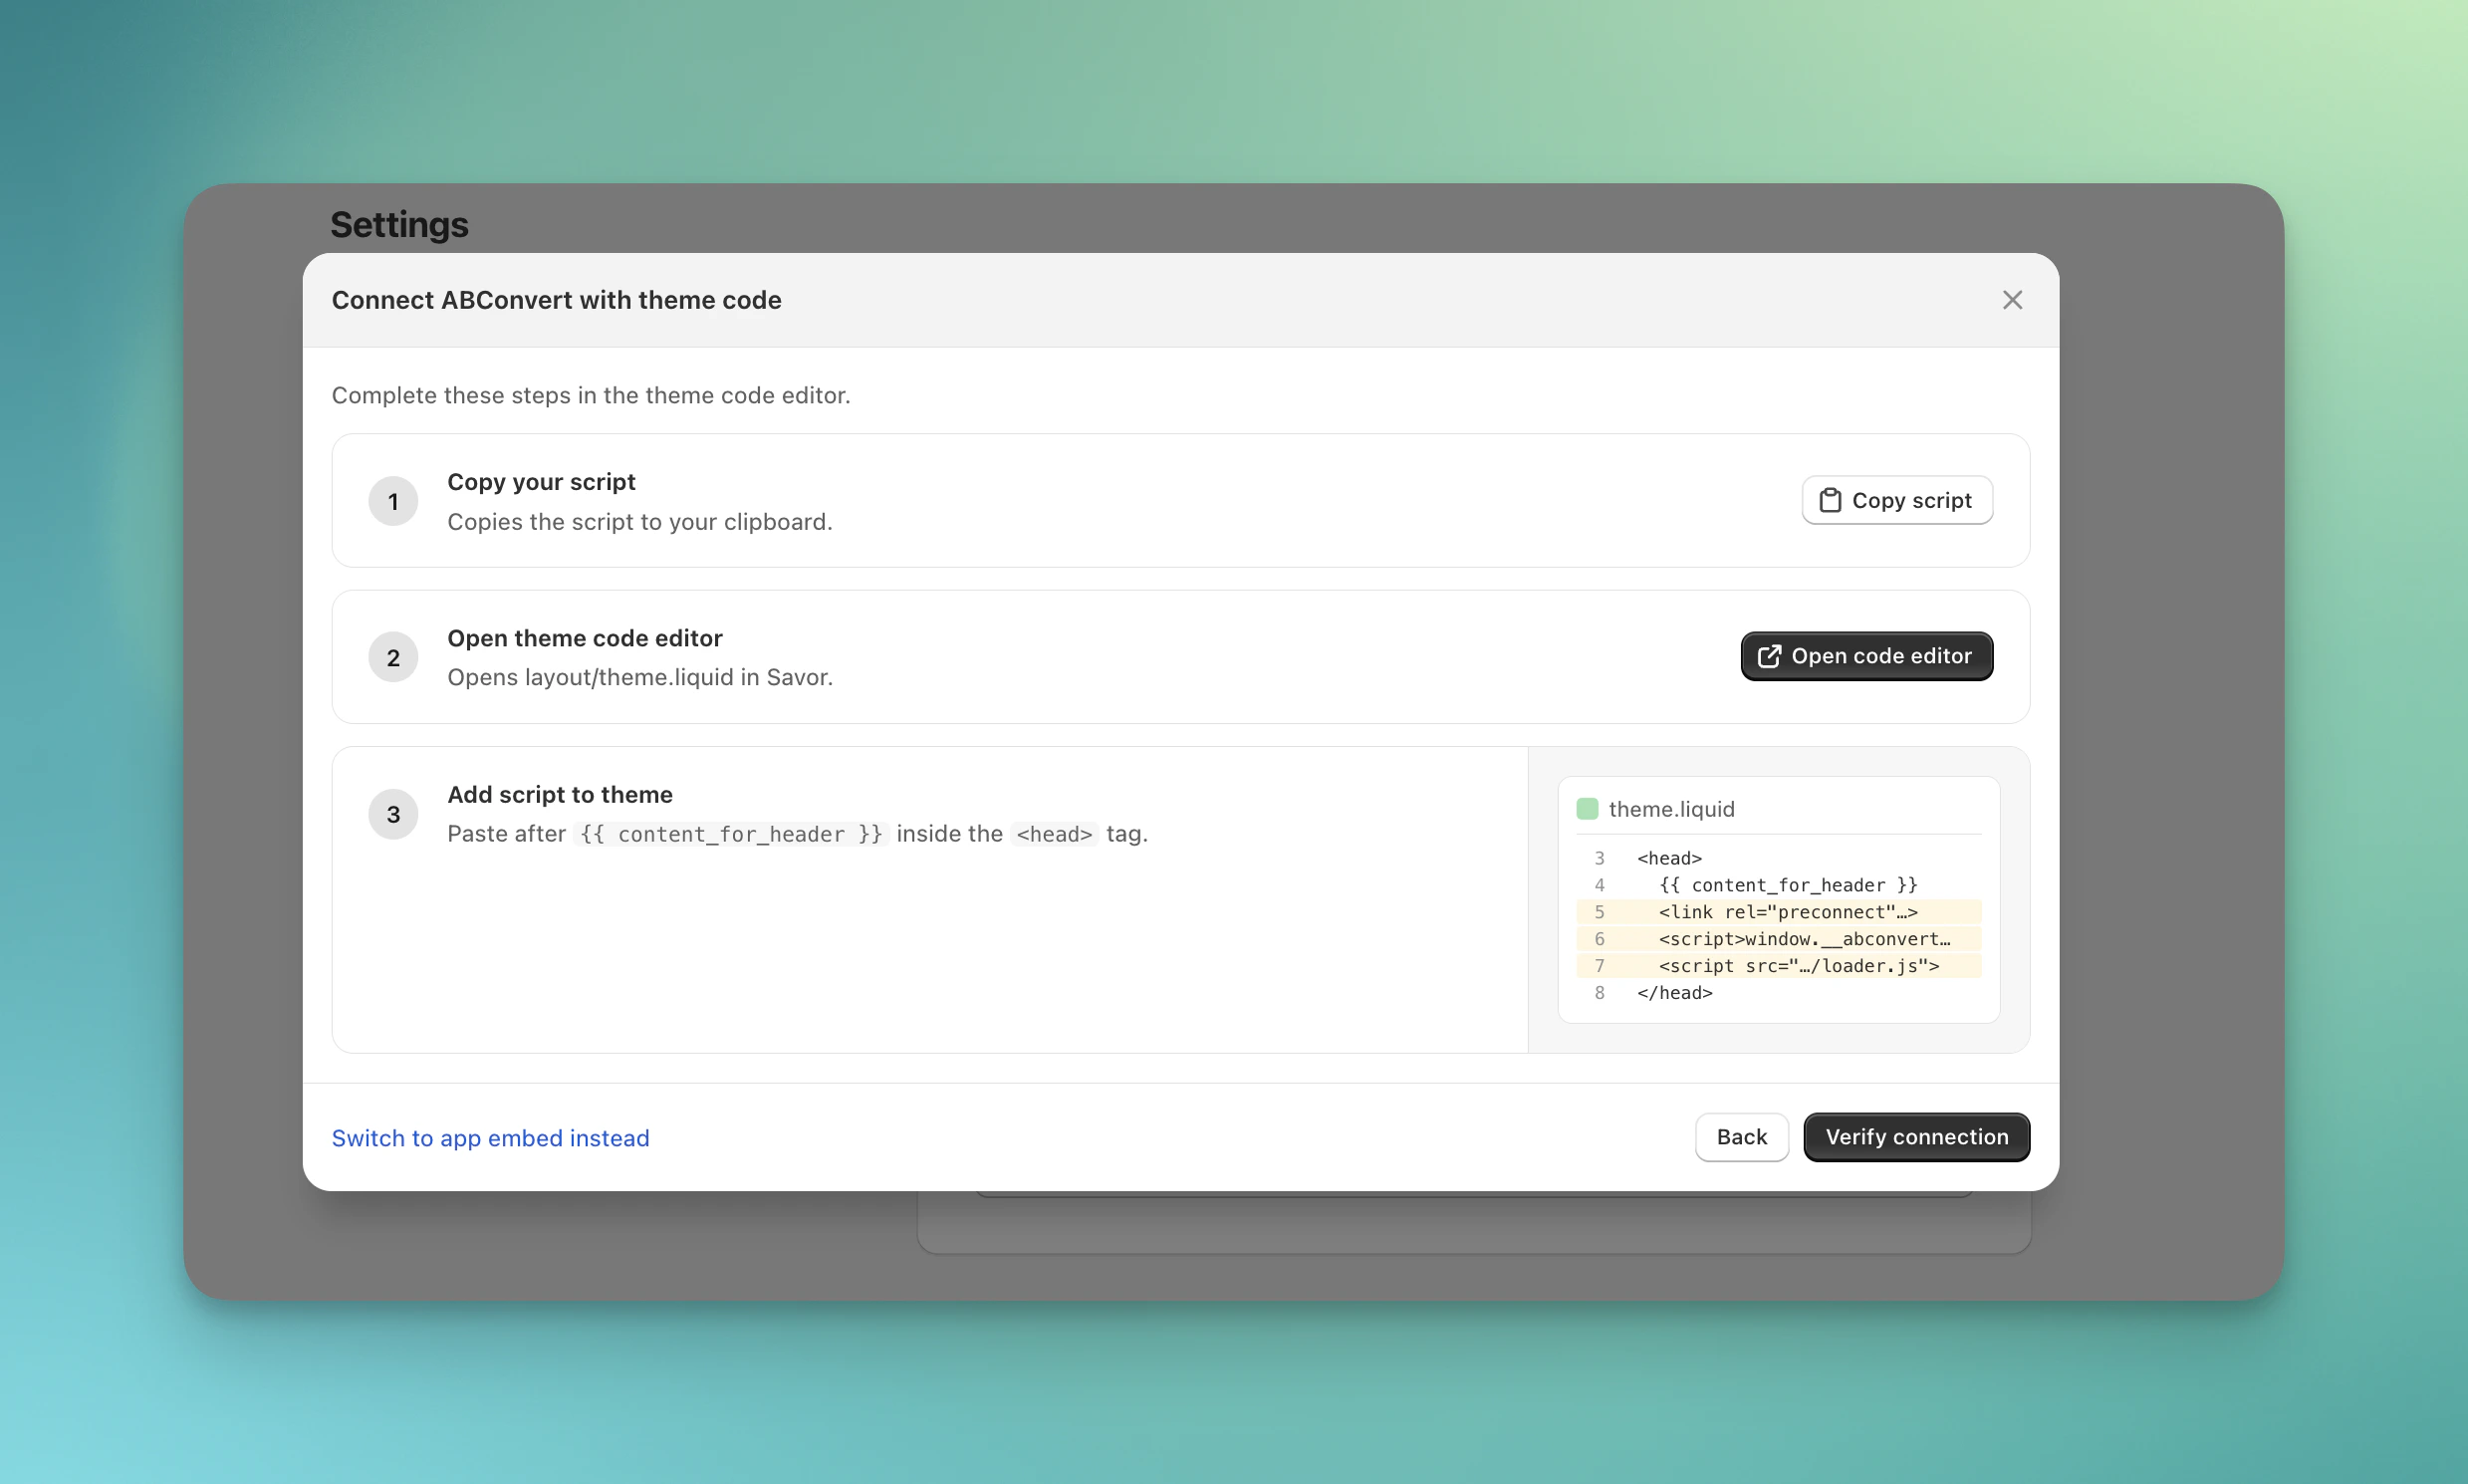 After finishing, when you update or change your theme, you still need to re-add this snippet to the new theme's `theme.liquid` file.
## WebPixel status
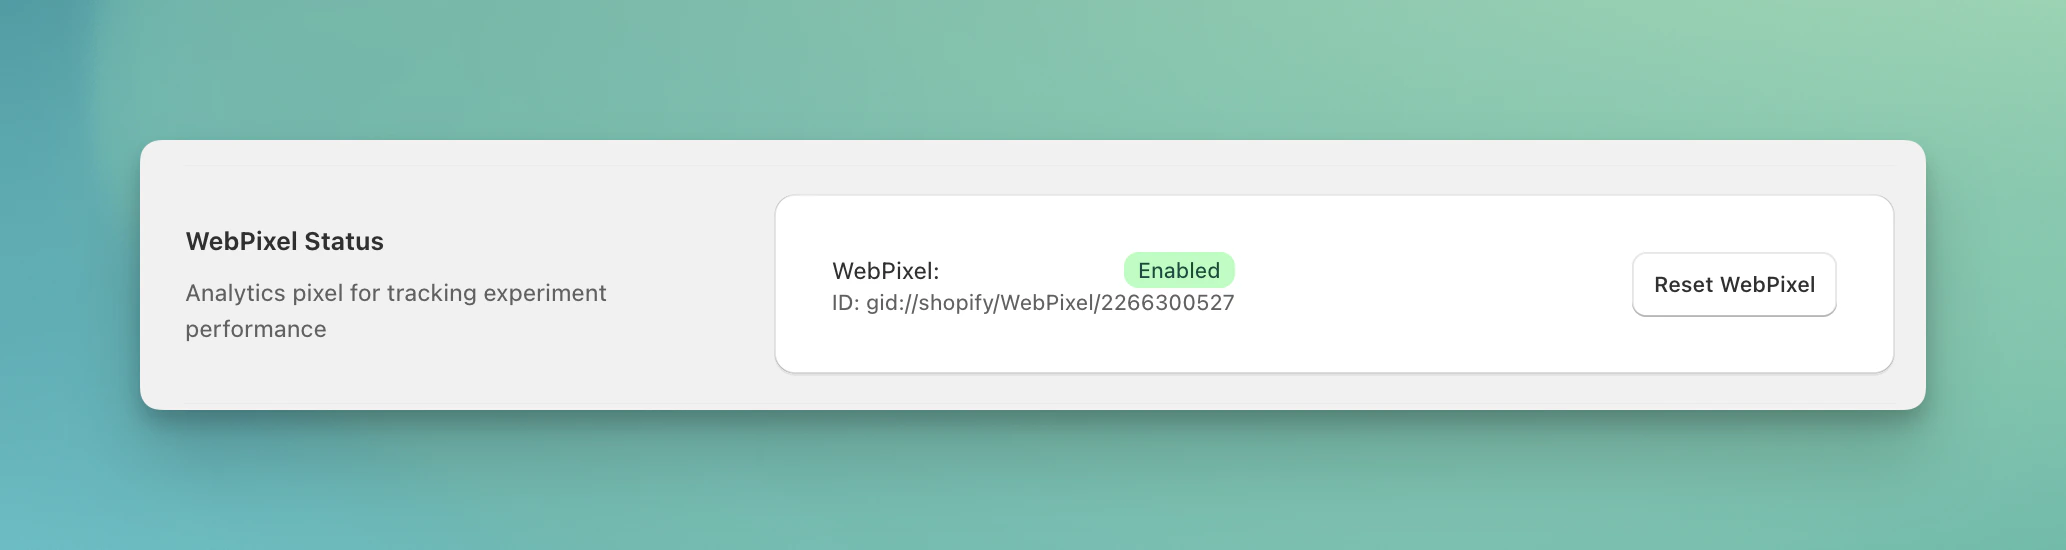
ABConvert uses a Shopify web pixel to track visitor events — page views, add-to-cart, checkout — with high accuracy. The web pixel is required for accurate analytics. Without it, ABConvert cannot collect and show experiment data correctly in analytics dashboard.
If the web pixel is not enabled, please create Webpixel before start a test. If it becomes misconfigured, use the **Reset** option to recreate it.
After finishing, when you update or change your theme, you still need to re-add this snippet to the new theme's `theme.liquid` file.
## WebPixel status
ABConvert uses a Shopify web pixel to track visitor events — page views, add-to-cart, checkout — with high accuracy. The web pixel is required for accurate analytics. Without it, ABConvert cannot collect and show experiment data correctly in analytics dashboard.
If the web pixel is not enabled, please create Webpixel before start a test. If it becomes misconfigured, use the **Reset** option to recreate it.
 ## Carrier service
Carrier service configuration is required for shipping rate experiments. When a carrier service is registered, ABConvert intercepts Shopify's shipping rate requests and returns the test rates for visitors in the experiment group.
The Settings page shows whether a carrier service is currently configured. You can delete the carrier service from this page if you no longer need shipping tests.
## Carrier service
Carrier service configuration is required for shipping rate experiments. When a carrier service is registered, ABConvert intercepts Shopify's shipping rate requests and returns the test rates for visitors in the experiment group.
The Settings page shows whether a carrier service is currently configured. You can delete the carrier service from this page if you no longer need shipping tests.
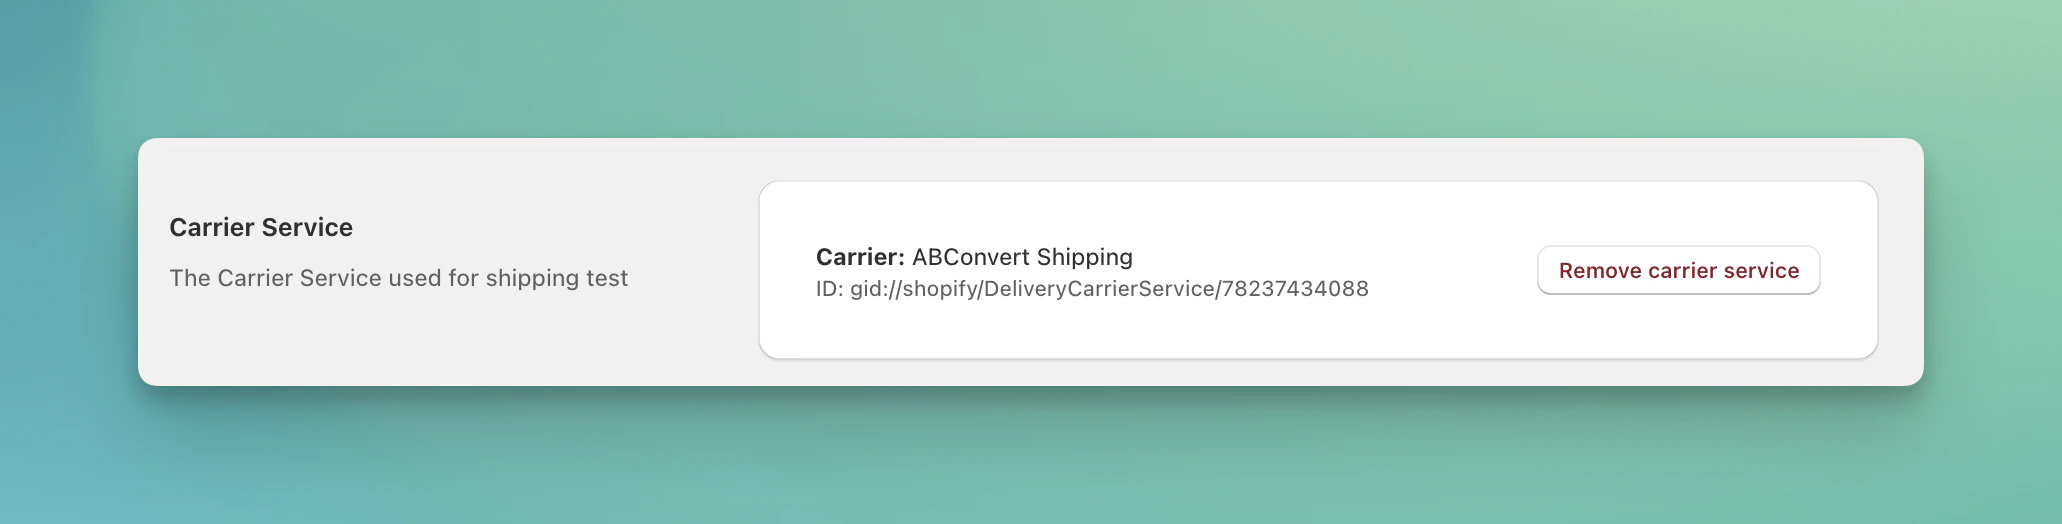 You cannot delete the carrier service while a shipping experiment is running. Stop all active shipping tests first.
## Order tag
ABConvert can automatically tag orders with experiment data, making it easy to segment orders by test group in your Shopify admin or in reports exported from ABConvert.
You cannot delete the carrier service while a shipping experiment is running. Stop all active shipping tests first.
## Order tag
ABConvert can automatically tag orders with experiment data, making it easy to segment orders by test group in your Shopify admin or in reports exported from ABConvert.
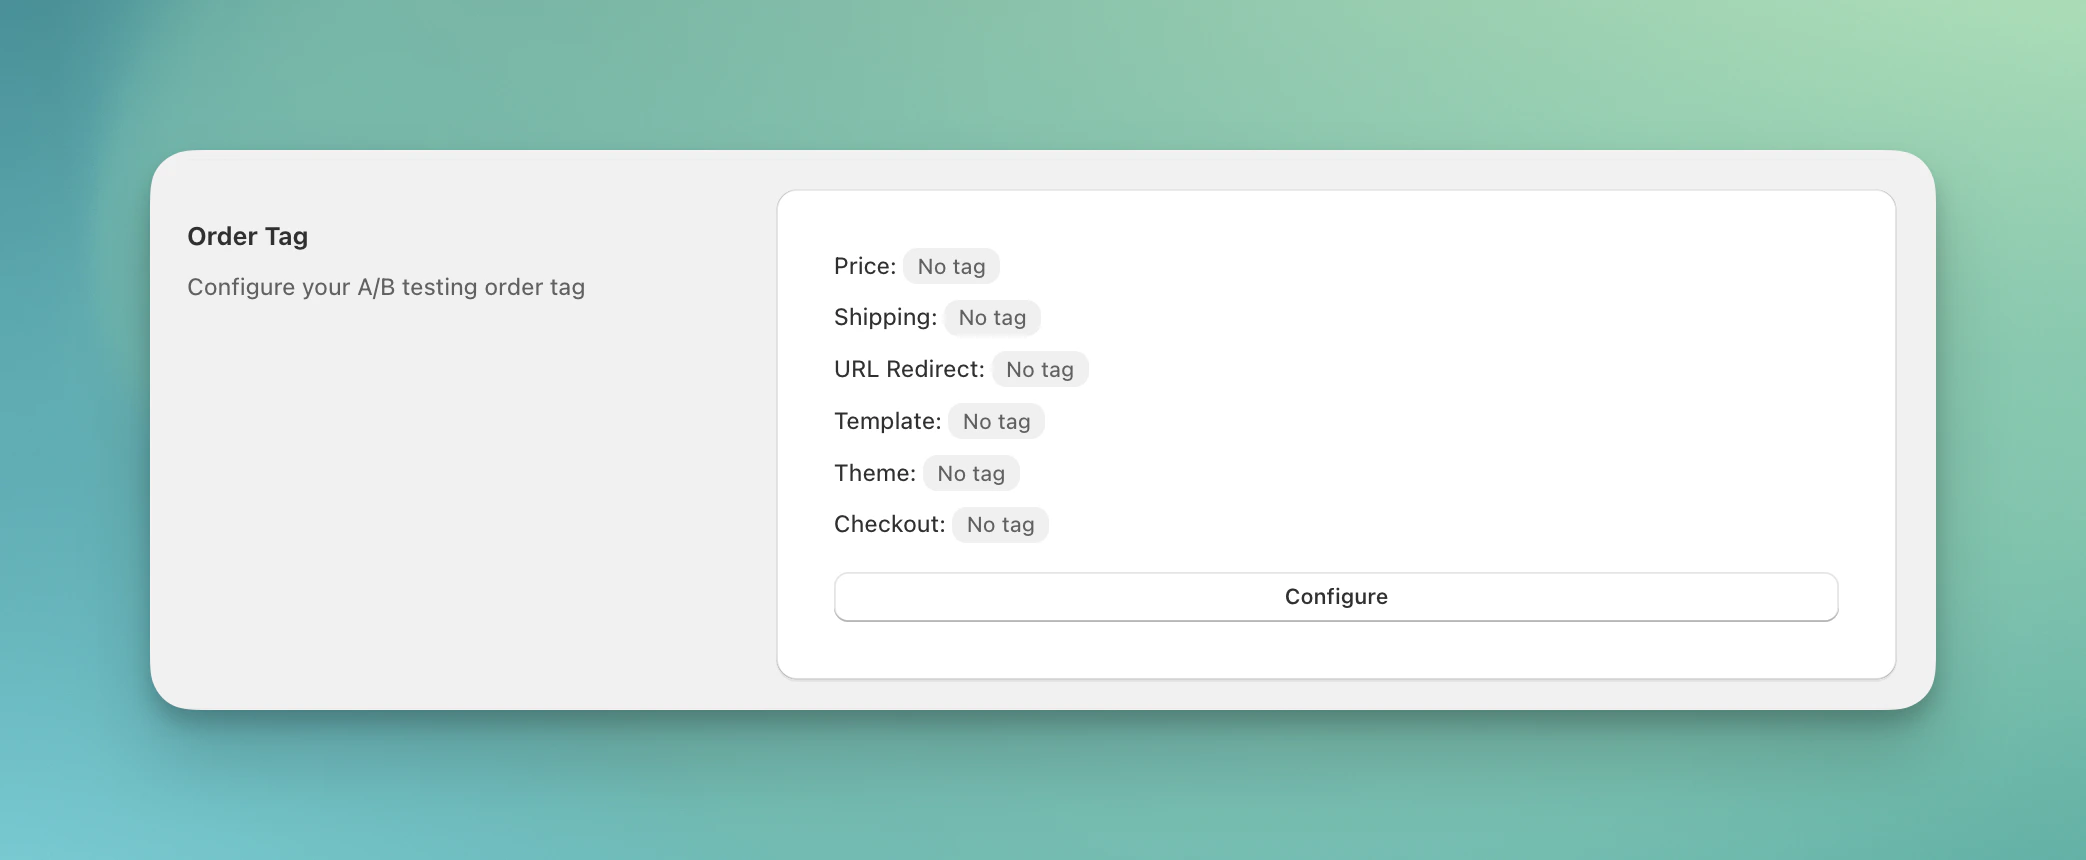 Click **Configure order tags** in Settings to open the tag configuration panel. For each experiment type, you can choose one of three tagging modes:
| Mode | Example tag |
| -------- | ------------------------------------------------------------ |
| No tag | *(no tag added)* |
| Plain | `ABConvert Price Test` |
| Detailed | `ABConvert Price Test: Group 0`, `ABConvert Price Test: 123` |
| Custom | Your own tag text (up to 40 characters) |
Order tags are available for: Price Test, Shipping Test, URL Redirect Test, Template Test, Theme Test, and Checkout Test.
Click **Configure order tags** in Settings to open the tag configuration panel. For each experiment type, you can choose one of three tagging modes:
| Mode | Example tag |
| -------- | ------------------------------------------------------------ |
| No tag | *(no tag added)* |
| Plain | `ABConvert Price Test` |
| Detailed | `ABConvert Price Test: Group 0`, `ABConvert Price Test: 123` |
| Custom | Your own tag text (up to 40 characters) |
Order tags are available for: Price Test, Shipping Test, URL Redirect Test, Template Test, Theme Test, and Checkout Test.
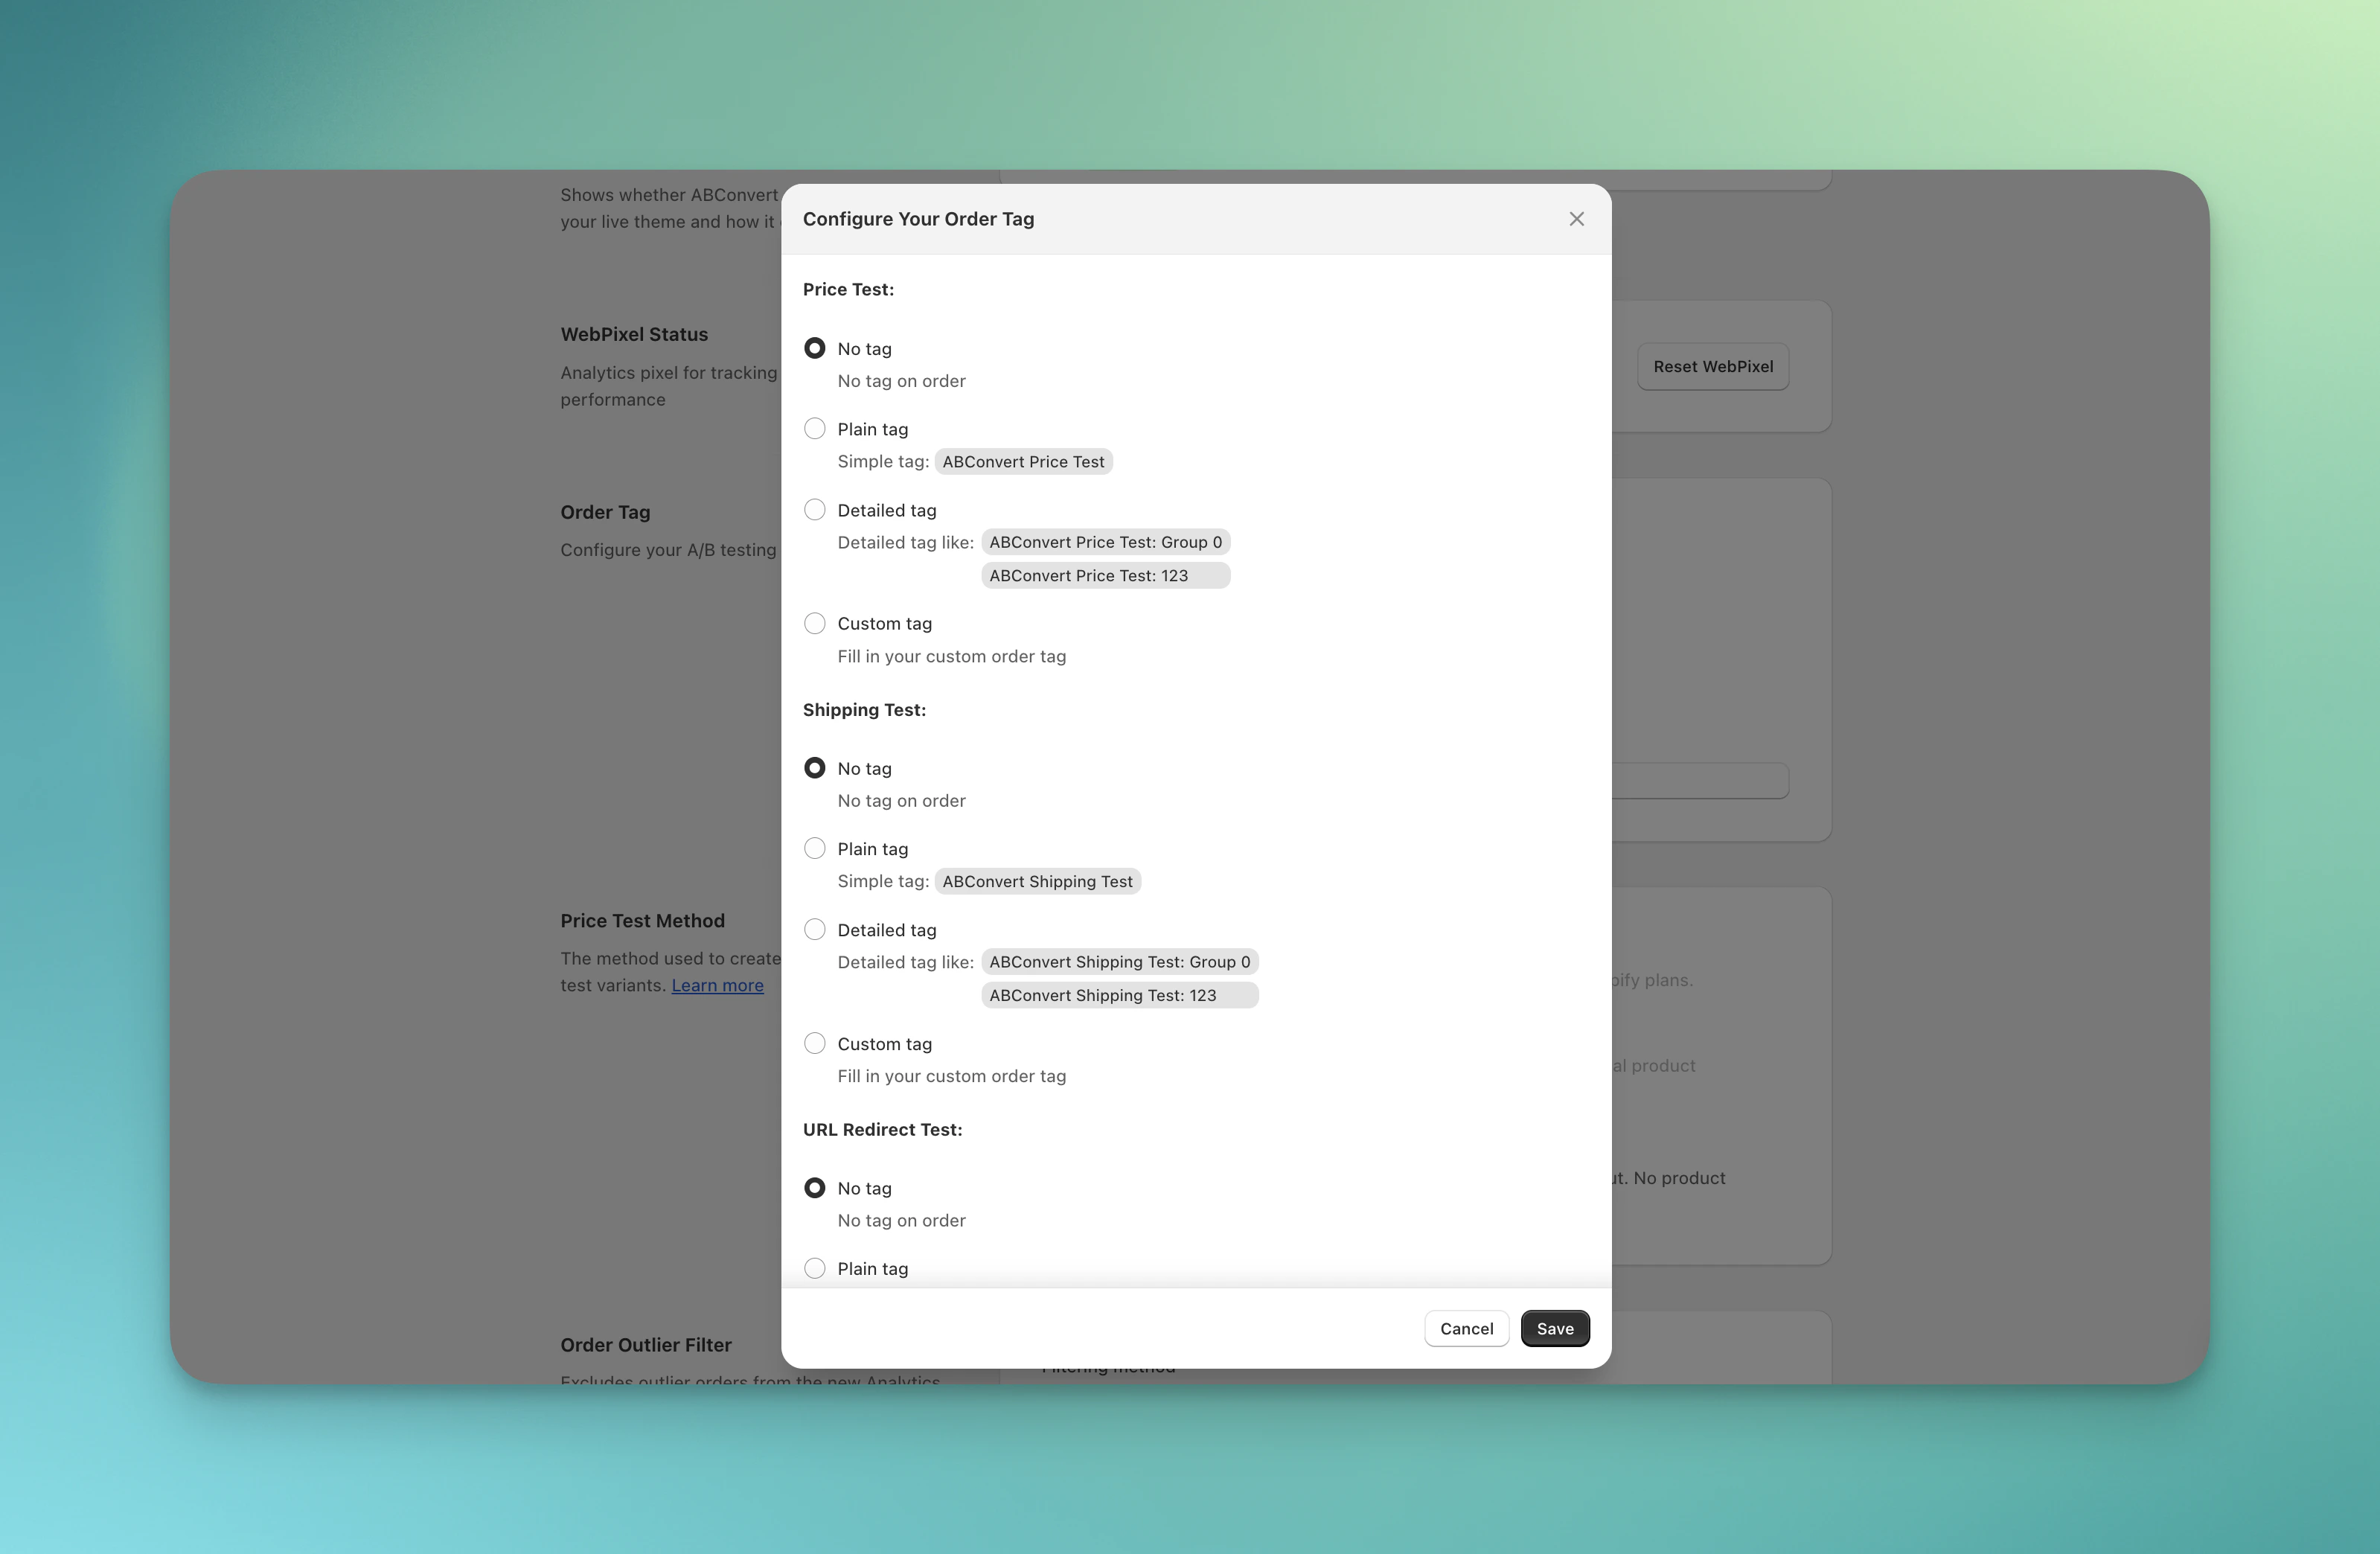 Use the Detailed tag mode if you want to filter orders by specific experiment variant in your Shopify admin or third-party reporting tools.
## Price test method
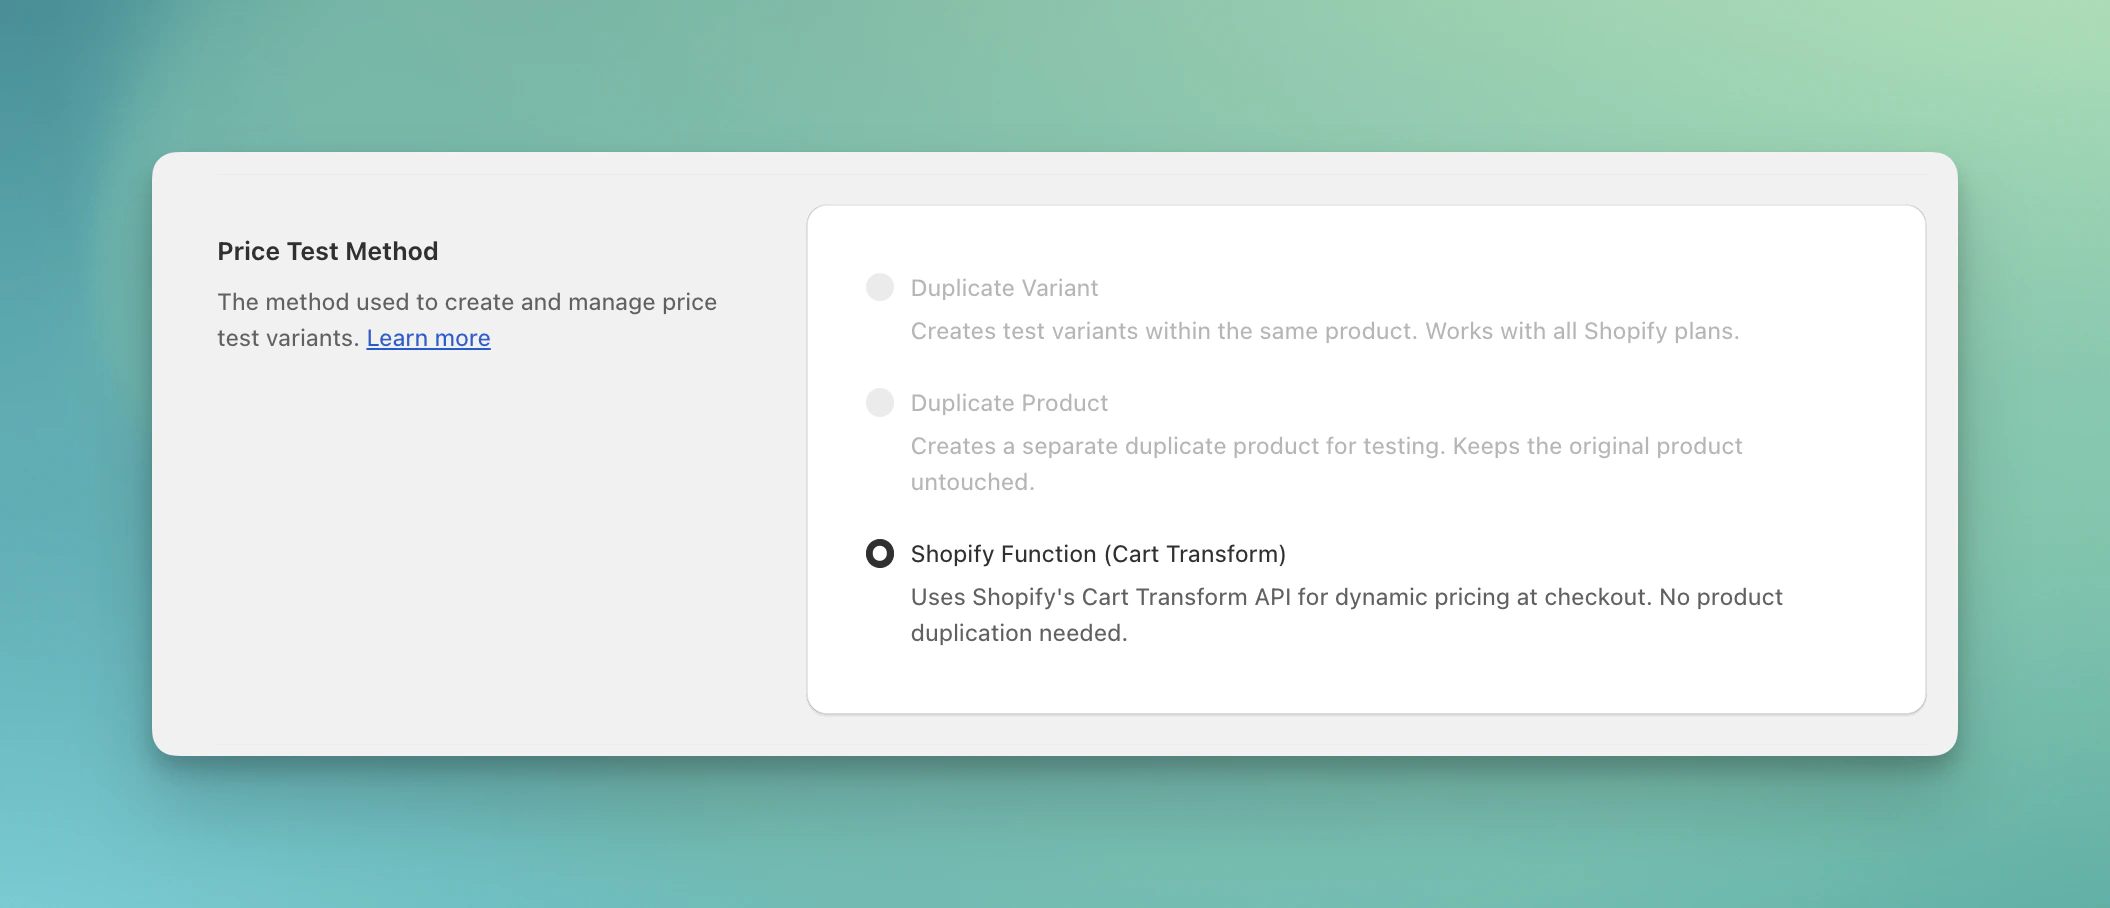
ABConvert evaluates your store during setup and assigns the optimal price test method. Currently, you cannot switch your method on your own, and all stores will be using Shopify function by default.
Use the Detailed tag mode if you want to filter orders by specific experiment variant in your Shopify admin or third-party reporting tools.
## Price test method
ABConvert evaluates your store during setup and assigns the optimal price test method. Currently, you cannot switch your method on your own, and all stores will be using Shopify function by default.
 ## Order outlier filter
The order outlier filter excludes unusually large orders from your Analytics dashboard, preventing them from skewing your experiment results.
## Order outlier filter
The order outlier filter excludes unusually large orders from your Analytics dashboard, preventing them from skewing your experiment results.
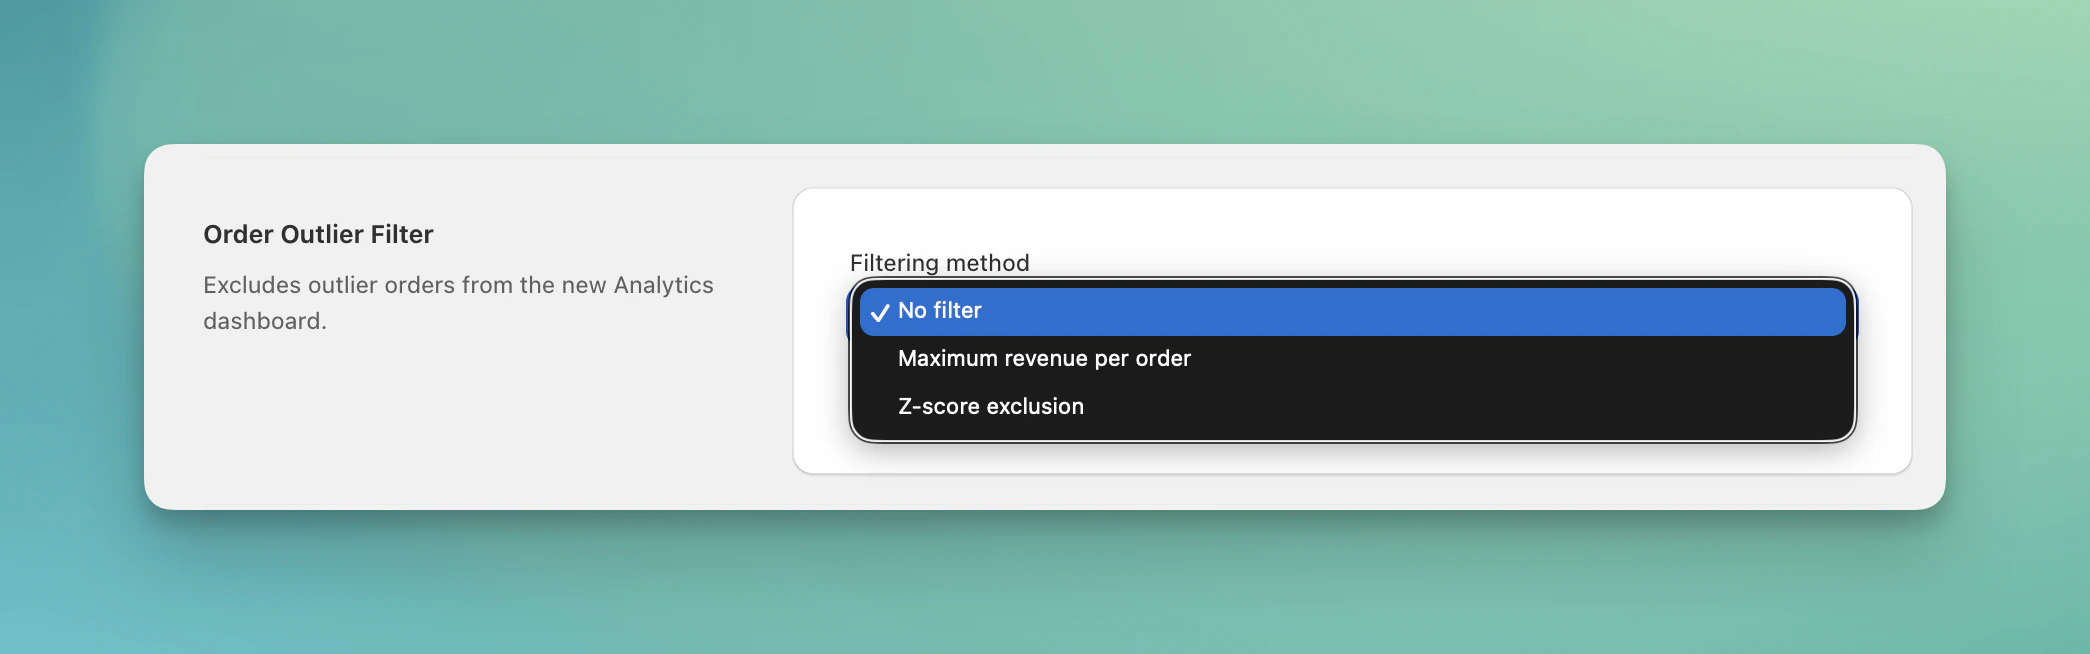 You can choose from three filtering methods:
| Method | How it works |
| ----------------------------- | --------------------------------------------------------------------------------------- |
| **No filter** | All orders are included in analytics (default) |
| **Maximum revenue per order** | Excludes orders above a specific dollar amount you define |
| **Z-score exclusion** | Excludes orders that are statistical outliers based on standard deviation from the mean |
### Maximum revenue per order
Set a dollar threshold (e.g., \$500). Any order above this amount is excluded from analytics. Use this when you know the upper bound of typical orders for your store.
### Z-score exclusion
Define a threshold between 1 and 5 (typical range: 2 to 4). Higher values keep more orders; lower values exclude more outliers. A threshold of 3 excludes orders more than 3 standard deviations from the mean.
If your store occasionally receives large wholesale or bulk orders that aren't representative of typical customer behavior, use the outlier filter to get clearer experiment results.
## COGS settings
ABConvert uses your COGS (cost of goods sold) data to calculate profit metrics in analytics, including **Profit per Visitor**, **Profit Uplift**, and other profit-based comparisons.
You can choose from three filtering methods:
| Method | How it works |
| ----------------------------- | --------------------------------------------------------------------------------------- |
| **No filter** | All orders are included in analytics (default) |
| **Maximum revenue per order** | Excludes orders above a specific dollar amount you define |
| **Z-score exclusion** | Excludes orders that are statistical outliers based on standard deviation from the mean |
### Maximum revenue per order
Set a dollar threshold (e.g., \$500). Any order above this amount is excluded from analytics. Use this when you know the upper bound of typical orders for your store.
### Z-score exclusion
Define a threshold between 1 and 5 (typical range: 2 to 4). Higher values keep more orders; lower values exclude more outliers. A threshold of 3 excludes orders more than 3 standard deviations from the mean.
If your store occasionally receives large wholesale or bulk orders that aren't representative of typical customer behavior, use the outlier filter to get clearer experiment results.
## COGS settings
ABConvert uses your COGS (cost of goods sold) data to calculate profit metrics in analytics, including **Profit per Visitor**, **Profit Uplift**, and other profit-based comparisons.
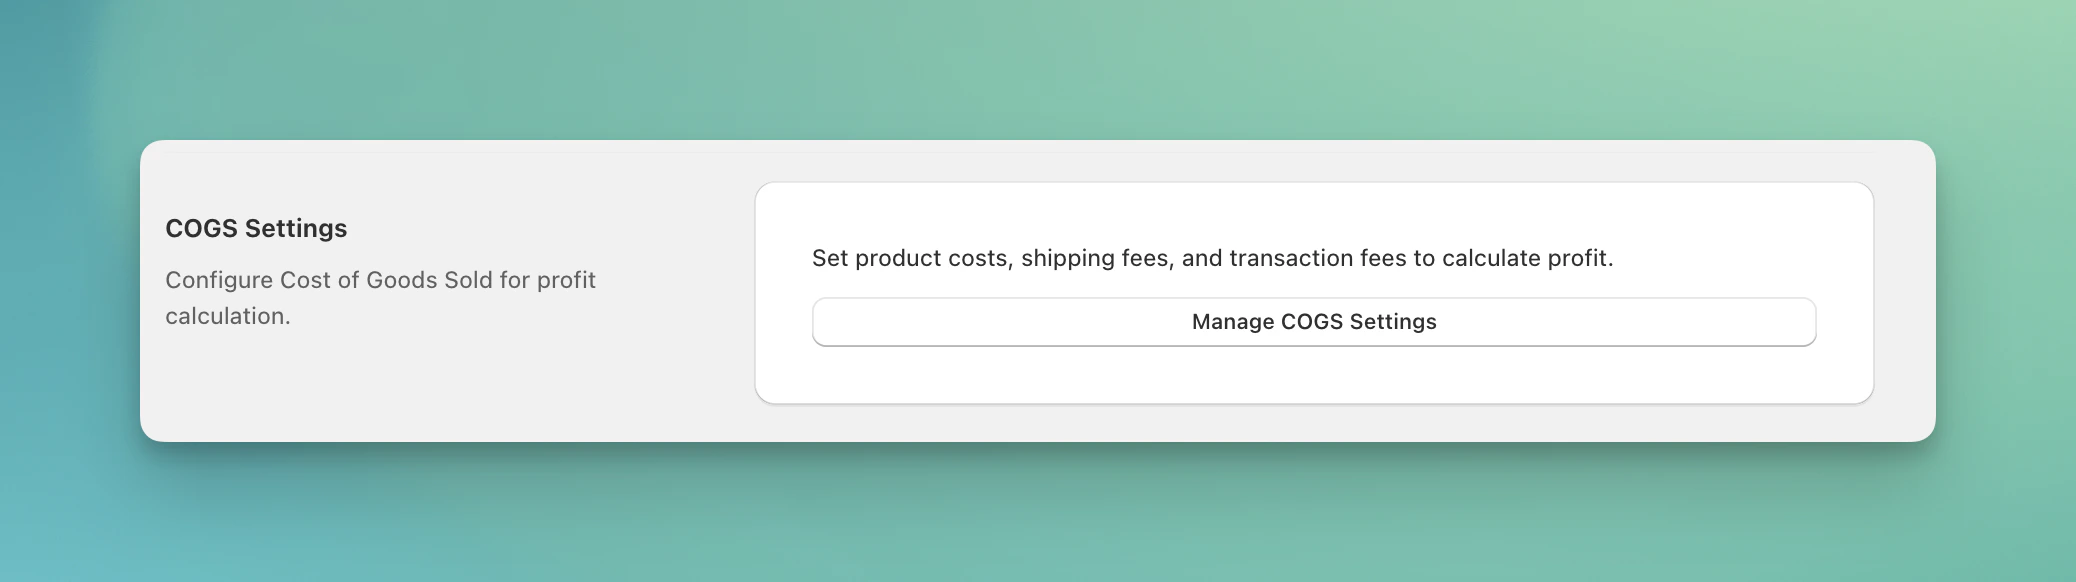 Click **Manage COGS settings** to configure these fields:
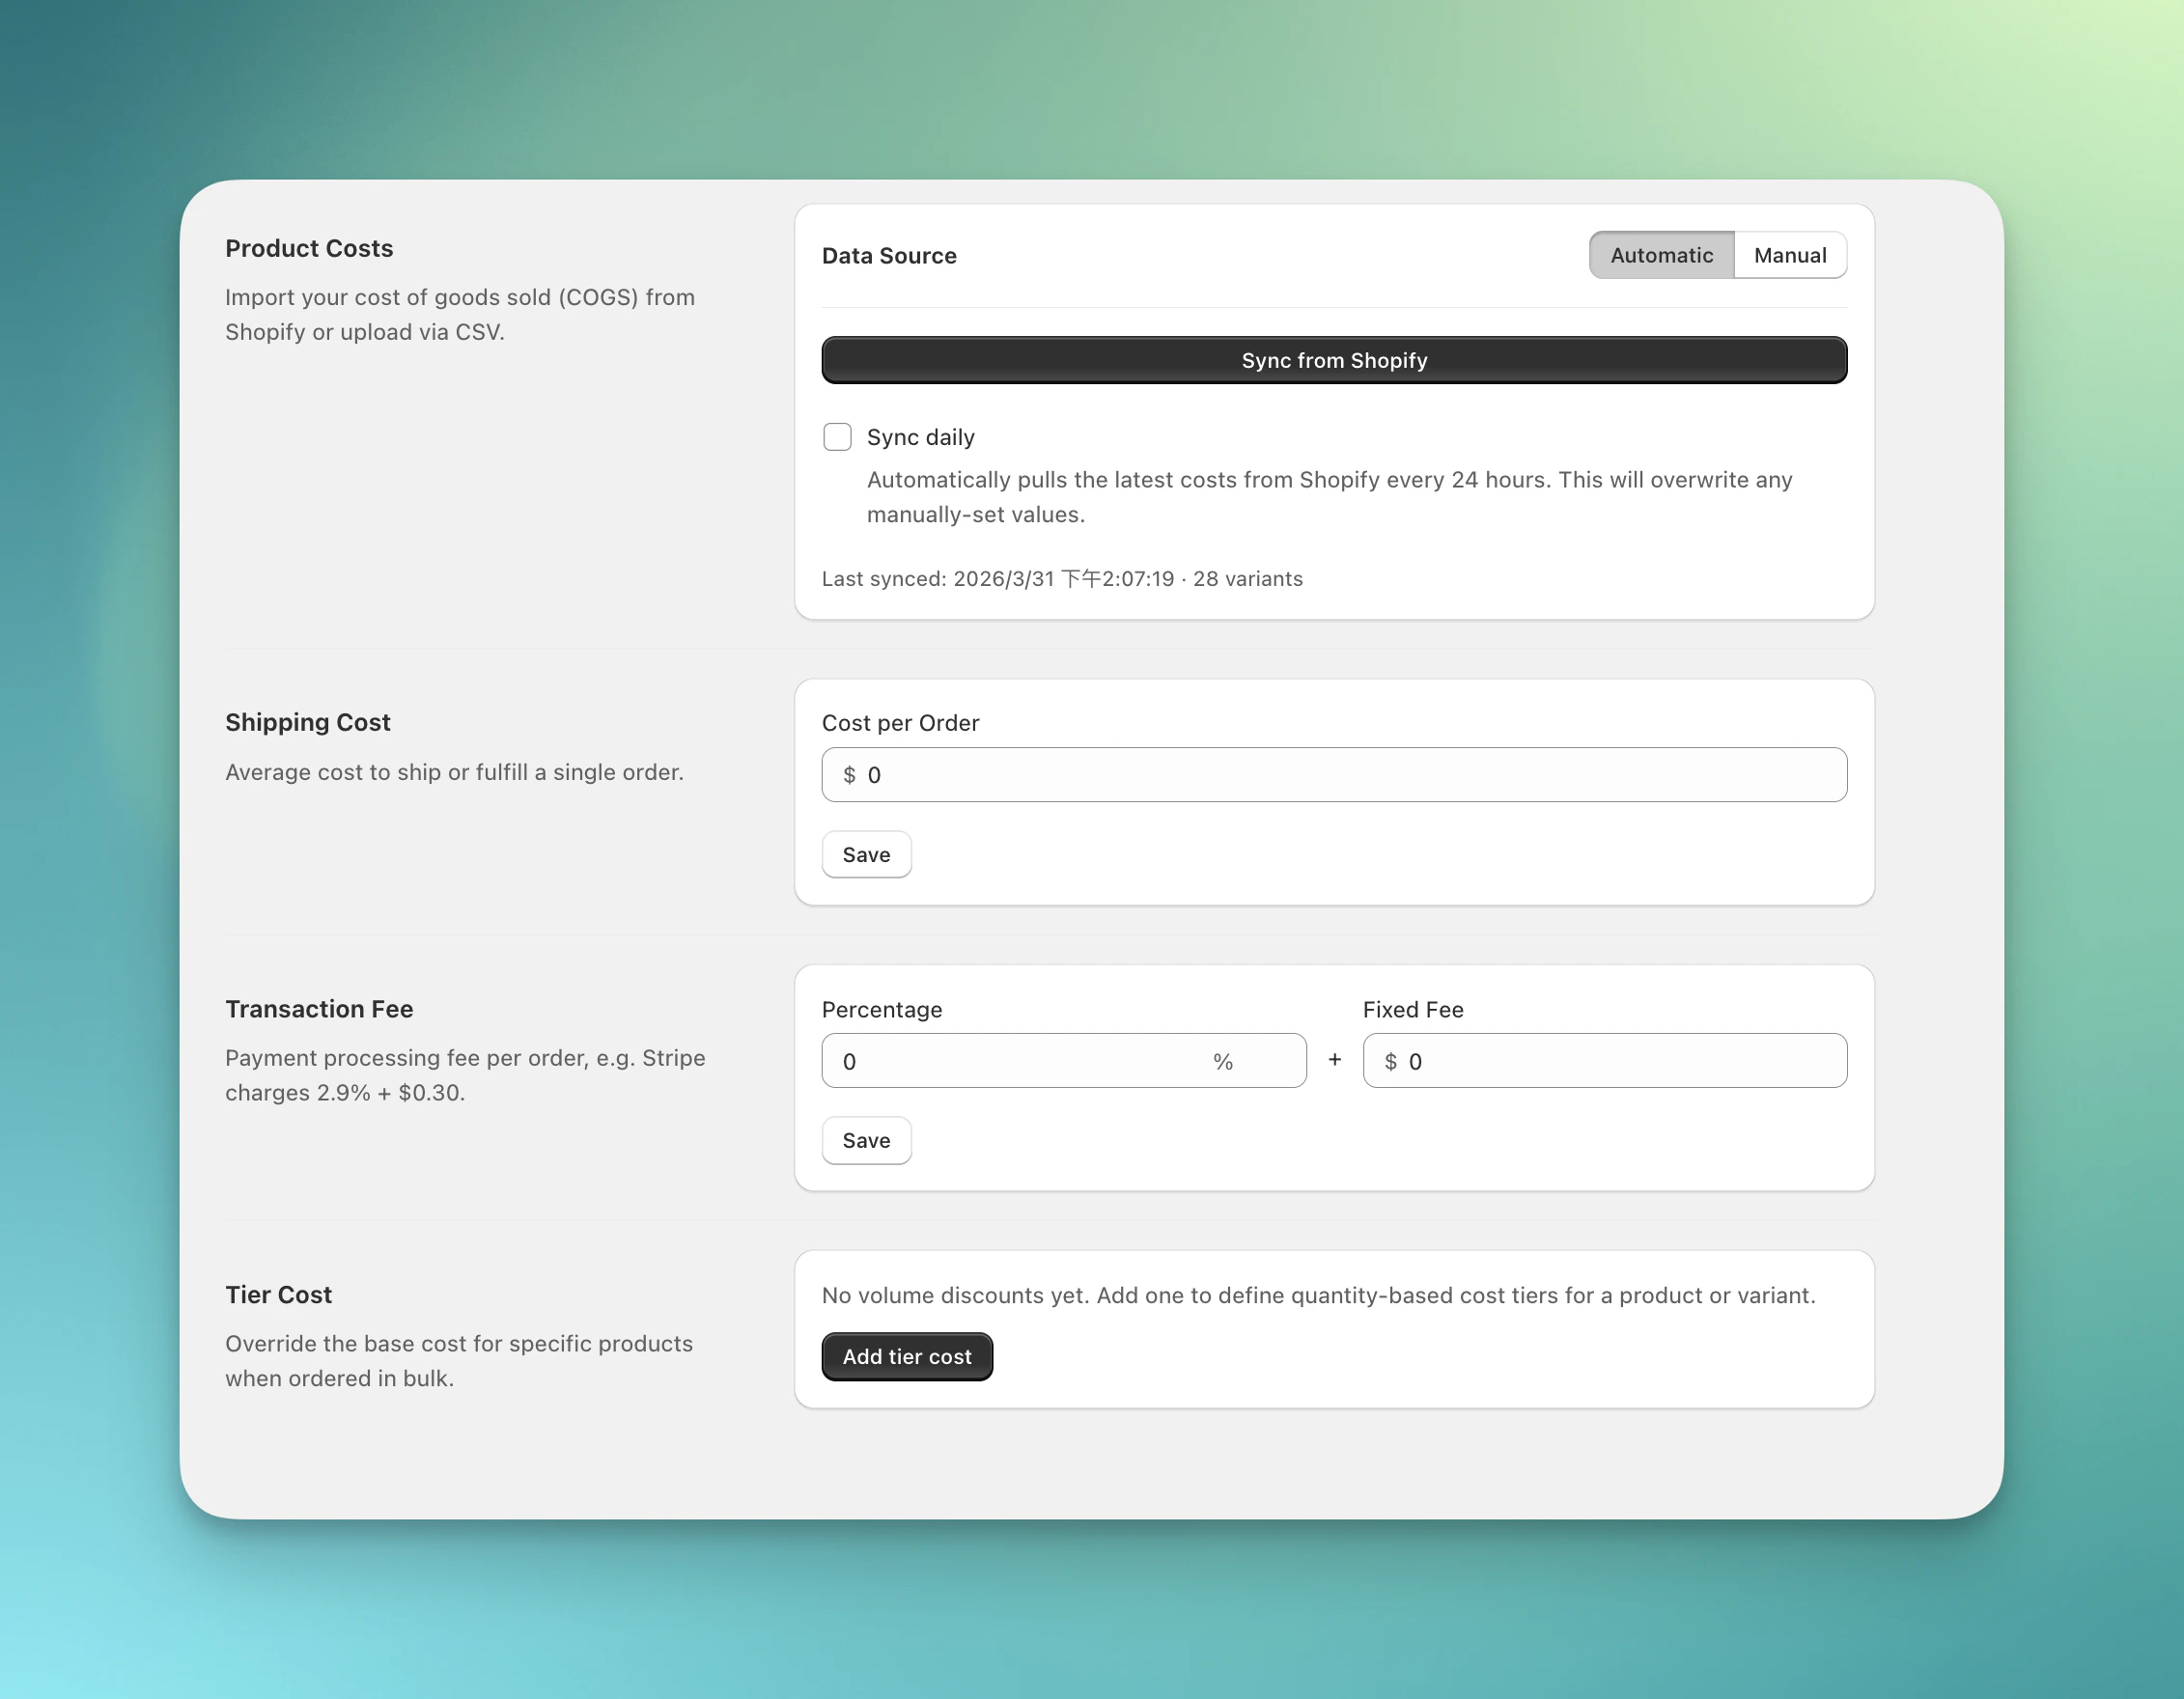 **Product Costs**
* **Automatic mode**: Sync product costs directly from Shopify. Choose daily sync frequency if your costs change often.
* **Manual mode**: Upload a CSV file with product costs for more control
**Shipping Costs**
* Set your average shipping or fulfillment cost per order
**Transaction Fees**
* Configure payment processing fees as percentage + fixed amount (e.g., 2.9% + \$0.30)
**Tier Costs** (optional)
* Override base product costs by quantity tier for wholesale or bulk order scenarios
* Define cost breaks at different quantity thresholds
If product costs are missing, ABConvert cannot calculate profit metrics correctly. Profit per Visitor and related metrics may show as zero or inaccurate until COGS data is properly configured.
Use Automatic mode with daily sync if your product costs fluctuate frequently. This keeps your profit calculations up to date without manual CSV uploads.
## Product groups
Product groups are reusable sets of products you can apply as a filter on a test's Analytics dashboard. Build one from a collection, tag, product type, or a hand-picked list. Click **Manage Product Groups** to create and edit them. See [Product Groups](/analytics/product-groups) for how to use them in analytics.
## GA4 Measurement ID
Enter your Google Analytics 4 Measurement ID here to connect ABConvert to your GA4 property. When configured, ABConvert fires a custom event in GA4 each time a visitor is assigned to an experiment, letting you analyze experiment data alongside your other GA4 metrics.
See [GA4 Integration](/configuration/ga4-integration) for setup instructions.
## Settings FAQs
Yes. We recommend keeping the ABConvert app embed turned on, even when you are not running tests. It will not affect your store if there are no active tests running, and it keeps your store ready for future tests and helps ABConvert confirm your storefront is connected.
Confirm the ABConvert app embed is enabled on the theme where your tests should run. Modifying a theme will not affect the embed app, but changing to a new theme will require you to enable the ABConvert app embed in the new theme before starting a test.
You can still view existing test data and historical analytics. However, ABConvert will ask you to reconnect before you can preview, launch, or continue tests that need the storefront script.
The app embed is recommended for most stores, but some custom themes may perform better with manual installation. If you notice slower loading or flickering, contact ABConvert support and we can help check whether manual setup is a better fit.
**Product Costs**
* **Automatic mode**: Sync product costs directly from Shopify. Choose daily sync frequency if your costs change often.
* **Manual mode**: Upload a CSV file with product costs for more control
**Shipping Costs**
* Set your average shipping or fulfillment cost per order
**Transaction Fees**
* Configure payment processing fees as percentage + fixed amount (e.g., 2.9% + \$0.30)
**Tier Costs** (optional)
* Override base product costs by quantity tier for wholesale or bulk order scenarios
* Define cost breaks at different quantity thresholds
If product costs are missing, ABConvert cannot calculate profit metrics correctly. Profit per Visitor and related metrics may show as zero or inaccurate until COGS data is properly configured.
Use Automatic mode with daily sync if your product costs fluctuate frequently. This keeps your profit calculations up to date without manual CSV uploads.
## Product groups
Product groups are reusable sets of products you can apply as a filter on a test's Analytics dashboard. Build one from a collection, tag, product type, or a hand-picked list. Click **Manage Product Groups** to create and edit them. See [Product Groups](/analytics/product-groups) for how to use them in analytics.
## GA4 Measurement ID
Enter your Google Analytics 4 Measurement ID here to connect ABConvert to your GA4 property. When configured, ABConvert fires a custom event in GA4 each time a visitor is assigned to an experiment, letting you analyze experiment data alongside your other GA4 metrics.
See [GA4 Integration](/configuration/ga4-integration) for setup instructions.
## Settings FAQs
Yes. We recommend keeping the ABConvert app embed turned on, even when you are not running tests. It will not affect your store if there are no active tests running, and it keeps your store ready for future tests and helps ABConvert confirm your storefront is connected.
Confirm the ABConvert app embed is enabled on the theme where your tests should run. Modifying a theme will not affect the embed app, but changing to a new theme will require you to enable the ABConvert app embed in the new theme before starting a test.
You can still view existing test data and historical analytics. However, ABConvert will ask you to reconnect before you can preview, launch, or continue tests that need the storefront script.
The app embed is recommended for most stores, but some custom themes may perform better with manual installation. If you notice slower loading or flickering, contact ABConvert support and we can help check whether manual setup is a better fit.